
By the author of The Faithful Prepper and Zombie Choices
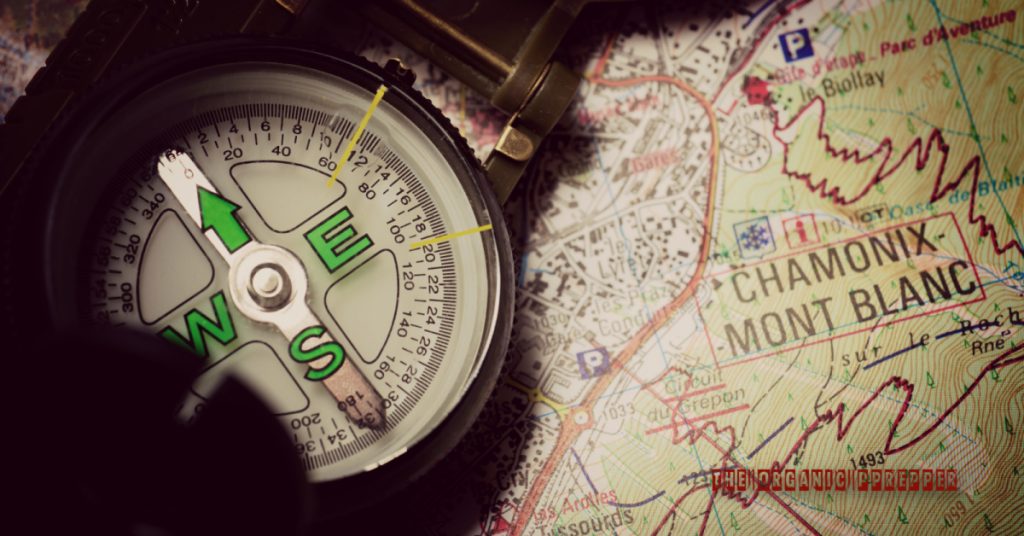
There are many ways to navigate, but for survival and true self-reliance, an excellent skill to have is the knowledge of how to shoot an azimuth using a compass and a map. First, for those who may not know that term, using a compass in the navigation process is known as shooting an azimuth. The term ‘azimuth’ is nothing more than a fancy way of saying, “This is the way I need to go.”
And, who doesn’t love maps? For many, maps symbolize adventure, and the planning process grasps people’s interest the world over. Within a disaster situation, maps become extremely valuable. Maps can help tell you where you are, where you need to go, and how to get there.
So, how do you utilize a compass and a map to determine the way from Point A to Point B?
Let’s take a closer look how to shoot an azimuth below.
The supplies you will need
You need five pieces of gear to shoot an azimuth using the method I’m going to show you:
- military protractor
- topographic map
- compass
- pen
- straight edge
Now, let’s go on an adventure
You’re a brave knight residing at your survival fortress. Your fair maiden has gone off on a shopping trip across the mountains to look for a pair of shoes to match her new crown. While she’s away from you, the SHTF. Thankfully, a friendly fairy swings by to inform you of a tragic wolf attack at the shopping center, and your maiden needs rescuing. You grab your gear and break out your trusty map. Steeps mountains are no hindrance to you and your magical running shoes.
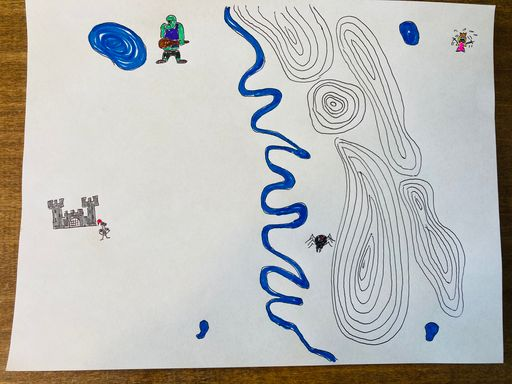
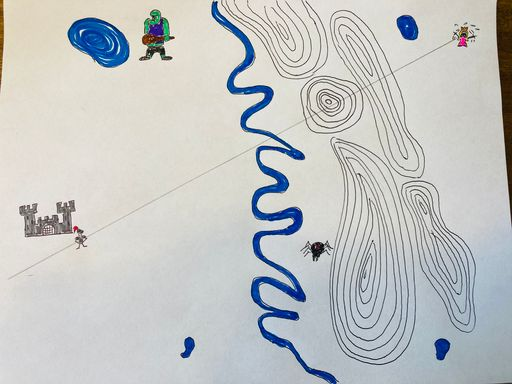
First: plot a line from Point A (your position) to Point B (Thy Fair Maiden). Use your straight edge and your pencil to do this on your map. It’s best to draw the line past both points to make it easier to determine the degree of your azimuth.
Next: get out the military protractor.
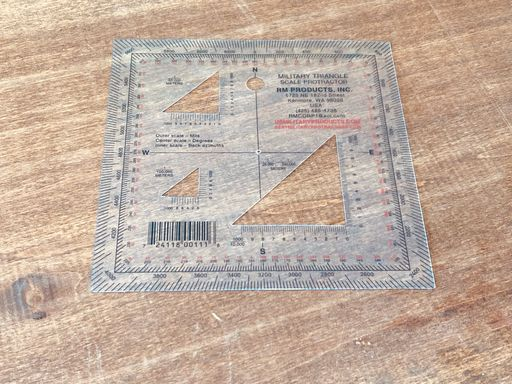
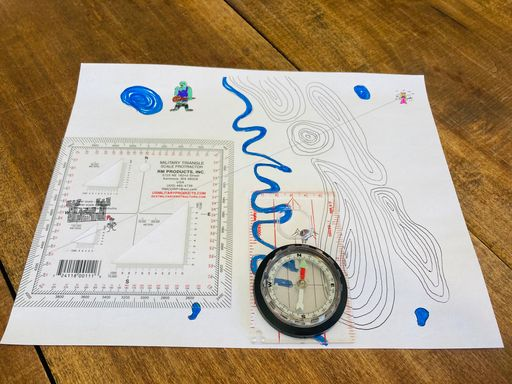
There are several different protractors available, but the ones I like to use look like the one above. When you place it on a map, it becomes much easier to read the markings. Just make sure you have it flipped the correct way!
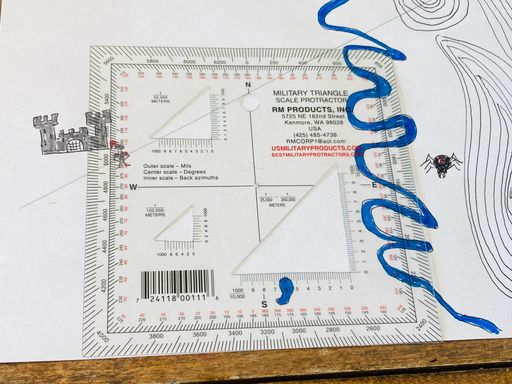
Note: On your topographic map, you’ll notice a grid pattern overlaid over the entire map. The grid pattern is present so you can determine the GPS coordinates of any location on the map. We’re more concerned right now with how to plot an azimuth, so we know which is the correct way to travel.
**Let’s pretend the corners of my paper map here are part of the map grid that you have on your topo map in front of you.
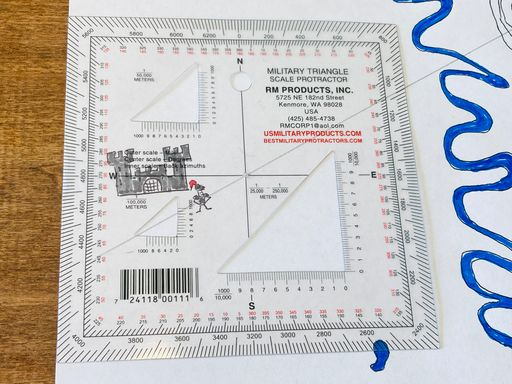
Lay your military protractor along these grid lines, ensuring you don’t have it cockeyed at some strange angle. The protractor must perfectly align with the map. Notice on my map, the center of the crosshairs line up with the plotline that I drew. That’s is precisely what you want. Do you see how the line extends past the edge of the protractor? One of those sets of numbers along the edge will tell me the compass degree I need for my azimuth.
Let’s look a bit closer
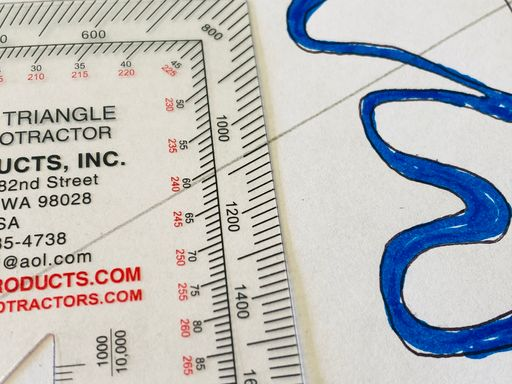
What trips a lot of people up here is that there are two sets of numbers. If you were in the military calling in an artillery strike, you would be using the outermost set of numbers, where the 1000 and 1200 markings are. The angle there is measured in ‘mils.’ We’re not concerned with mils. Ignore the outermost markings. (Some people cut off the outer markings to eliminate any potential confusion.)
What we want are degrees. To measure, you want the inner markings. You can see in the image above the angle of travel is right in between 60 and 61 degrees. For training purposes here, we’ll assume that this is 60 degrees.
You want to remember that number.
Now, it’s time to use the compass
Here’s the one I like to use.
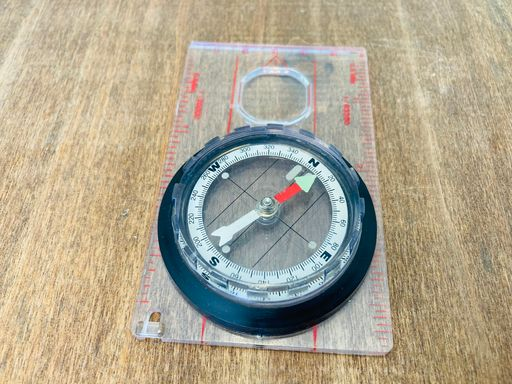
Place the compass on your map. I have my compass oriented along the grid north of the map, which means the top edge of the map and the compass placement all point the same way.
On every map, you’ll see a little compass marking that tells you where true north and magnetic north are. True north is the direction towards the north pole. Magnetic north is the direction your compass is going to point. True north and magnetic north are not the same. It’s confusing, but for whatever reason, magnetic north is at a different location. Understanding the difference here can help you to understand your position on a map better. The little compass on your map you’ll see will look like a circle within another circle. Kind of like this:
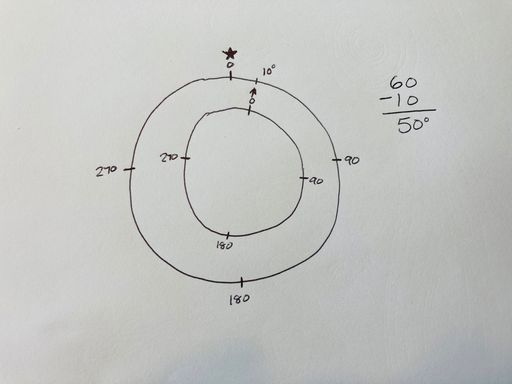
The process will involve a lot more markings, but the image above gives you the general idea. The outer circle with the star tells you the direction of true north on your map. The inner circle (that’s likely canted) tells you the direction towards magnetic north. In our case here, you can see that the magnetic north is 10 degrees to the right of true north.
You will need that information to plot a better azimuth.
Time to make accommodations when plotting
According to the protractor, we need to plot a point of 60 degrees from true north to get to the Fair Maiden. However, the compass doesn’t point to true north. It points to magnetic north. If we follow a 60-degree azimuth from magnetic north, we will end up far off to the right of where the Fair Maiden is. Therefore, we must accommodate for this when plotting the azimuth.
To do this, take the protractor reading (60 degrees) and subtract the 10 degrees that magnetic north requires. The result is 50 degrees.
That’s the bearing to follow to get straight to the Fair Maiden.
Tip: Here is an easy way to remember this I learned from NC Scout at American Partisan. Anytime you’re going from General (grid north) to Major (magnetic north), you get a demotion (meaning you subtract). If you’re going from Major (magnetic north) to General (grid north), you get a promotion (meaning you add).
Sometimes going farther is better than going harder
In this example, you see the knight is traveling right over a mountain range.

In real life, that would be brutal. Imagine hiking straight up the sides of two different mountains. In many cases, it may be downright impossible (cliffs and such). A more realistic pathway for our knight would be to go through the valleys to the south of the first mountain to get to the Fair Maiden.
Doing so would require additional map plotting and azimuth shooting. Even though this requires a further distance traveled on the map, it actually equals a more accessible and safer pathway to the end goal. Chances are you would have to do the same thing when shooting an azimuth in the woods.
Ready to shoot an azimuth for your own adventure?
I highly recommend picking up a copy of the Army’s field manual on the subject, FM 3-25.26. Also known as Map Reading and Land Navigation. This book goes into greater detail on how to use a compass, maps, and military protractor.
And that’s how you plot an azimuth to follow with your map, protractor, and compass! What are your thoughts on the subject? Are there other tips and tricks you think others should know? Let us know in the comments below!
About Aden
Aden Tate has a master’s in public health and is a regular contributor to TheOrganicPrepper.com, TheFrugalite.com, PewPewTactical.com, SurvivalBlog.com, SHTFBlog.com, ApartmentPrepper.com, HomesteadAndPrepper.com, and PrepperPress.com. Along with being a freelance writer, he also works part-time as a locksmith. Aden has an LLC for his micro-farm where he raises dairy goats, a pig, honeybees, meat chickens, laying chickens, tomatoes, mushrooms, and greens. Aden has two published books, The Faithful Prepper and Zombie Choices. You can find his podcast The Last American on Preppers’ Broadcasting Network.


13 Responses
When I was in college (early ’80s) we called this Orienteering and did it in the BWCA of Northern Minnesota. It was great fun, but you had better be in shape…!
Magnetic north was in Canada’s Arctic for many years. It is now edging into Russia. Always on the4 move. As one crosses the country, let’s say from east (Washington, DC) to west (Washington State) the adjustment difference between magnetic and true north increases. Magnetic north is farther to the east as one goes west. When I was sailing and flying we referred to a chart that showed how much magnetic north changed, relative to location.. At that time, on the west coast, it was 6 degrees.
Hello
There are actually three norths on a map, Magnetic, True, and True, and the vast majority of time none of them are the same. If you look at a National Geospatial Agency Map they will have all three of them on the of the map sheet with annual changes as appropriate.
My credentials: Former Government Cartographer, National Class Orienteerer in college, and teacher of multiple map reading classes in the USMC and the Army National Guard.
The next class should be on resection to find yourself, and then building a a relief profile for a straight route.
Thanks
Mike Hopper
Yeah, fun.
https://youtu.be/Jlo-PHYQ02w
What brand of compass are you using?
I like both Silva, and Suunto.
I have a USGI compass, but it does not have declination adjustment like the commercial ones do.
In my experience with hiking, my most common problem has been along the lines of: “I think I know where I am on the map… but I’m no longer sure.” Any tips in that sort of situation?
You could avoid hiking. Or perhaps try to track your progress by calculating your path as you progress. When running a ship through the ocean (well before GPS), we’d plot our path continuously, occasionally taking a fix (a celestial measurement to estimate our position) and adjusting our plot as necessary. I see no reason why this practice wouldn’t be equally as useful in land navigation, avoiding the celestial stuff, naturally.
There is the US geological site (forgot the name) that you go to for the latest magnetic reading for your area and you are gonna have to adjust your compass readings. I heard it changes over time (forgot how long) so you have to readjust your compass readings from time to time.
But I’m surprised he did not include the most basic way to orient yourself N/S with some sticks in the ground and sun/shadow as last resort. i think there are other ways, watch/sun etc.
Map/compass for the most accurate and safe way is the best, of course. But you can forget it, lose it, EMP disaster, etc., so have Plan B.
Good basics…
Terrain association by knowing map symbols is very helpful. Map says I am on a hill…am I?
Honestly I was at best an “ok” navigator.
Pace count….72 for me.
1:50000 maps are pretty easy to get. I have an “app” for that!
But I have a wrist Garmin still from the old days until the satellites fall out of the sky. I really hate getting old!
I could tell you a funny story about some urban navigation in Haiti that earned me a nickname, “a boy and his map.” So much for a short cut I swore was on the map! It was on the map, but alas the road was now a festering garbage heap no HMMV would get through!
I did this as a boy scout in the mid-70s. I almost got lost in the Jersey Pine Barrens.
Good Job Aden. It’s not difficult to Orienteer or Shoot the Azimuth. I learned 50 years ago in Boy Scouts. The three years I was employed by the BLM as a member of a surveying team really drove the lessons home.
I start the kids off with this when we take them camping (now it’s the Grandkids), we even make a game of it. As the child gets older we start using more accurate compasses, and even a 100+ year old Pocket Transit.
The games become more complicated with multiple bearing changes.
All done to pass on a valuable skill. One that could very easily save your life.
This is basic land nav and was very important in the military (especially for infantry, armor, and artillery). When I was in the Marines, land nav was the first class taught on training day one at Infantry Training Regiment (now called School of Infantry). At Camp Pendleton, CA, land nav wasn’t terribly hard because of all of the nice distinct terrain features (mountains, roads, etc) easily visible from other distinct terrain features. It was pretty easy to find them on a military topo map. Navigating in a forested area (like at Camp Lejuene, NC, the Sierra Nevada’s, or northern Michigan) is harder due to limited visibility. The darned trees kept getting in the way. Deserts are also hard if they are flat and relatively featureless. I’ve traipsed all over various terrain in my military time using a map and compass. GPS was just starting to come out when I retired. Yes, we used stone and chisels to keep notes when I started. 🙂
Personally, I prefer a US military lensetic compass, but I can use the civilian orienteering types (Suunto, Silva). In fact, I usually wear a Suunto wrist compass and have for years even when I was a civilian police officer in a heavily urban area. If you ended up in a city other than the one you worked in, some subdivisions were rather winding and confusing. If you needed to give dispatch a direction while you were out on a foot chase, a wrist compass was invaluable.