
If you're new here, you may want to subscribe to my RSS feed. Thanks for visiting!
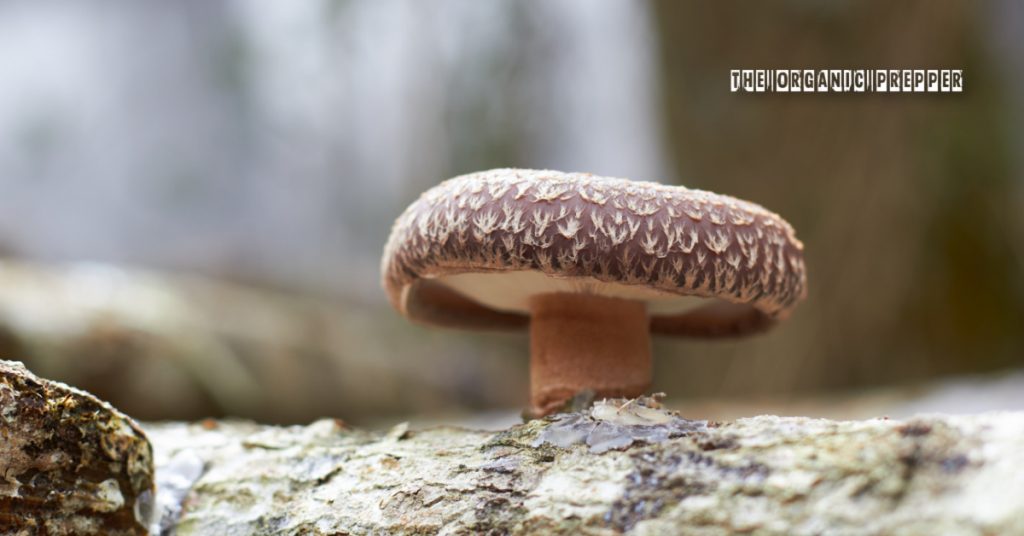
So you’ve purchased our Mushroom Cultivation course, harvested a few yum-yums, and would like to delve deeper into the fine art of mushroom cultivation. You may have noticed that liquid culture (LC) runs anywhere from $15-$30 per 10 mL syringe, and the cost adds up! Fear not, and read on! In this article, I’ll discuss what I’ve learned about monotubs and Martha tents and instructions for making your own master cultures.
First, monotubs.
Contrary to the YouTube videos, these have a few finer points of their own. Whether you made your own or purchased a kit, you’ll need to replace filters from time to time. Some stores will sell the 2” filters that I need by the sheet, 6 per sheet. However, my monotub needs 8!
There are a couple of options, the obvious one being to buy more than one sheet. Northspore will sell me one sheet of six for $8, which is $0.75/per filter. I purchased 24 3” filters on eBay for $38, which is $0.63/filter, and I can cut them to size. I can also use double-sided tape since these aren’t self-adhesive.
In a pinch, I’ve used coffee filters, which are free since they’ve sat in my cupboard for a few years. I’m a tea woman and purchased these for a friend’s visit many years ago. Repurposing what I have is cheaper than buying. Remember: the purpose of the filter is to allow air in while keeping contaminants out. Coffee filters are a pretty tight weave and will work in a pinch. I prefer the synthetic filters because they’re a bit more sturdy, as in my cats won’t punch holes in them during exploration. This is good.
Another thing to be aware of is when to case the substrate and with what.
The first time I did this, I jumped the gun and used Miracle-Gro potting mix. This resulted in the mycelium dying back without fruiting. Miracle-Gro tends to add things to their mixes that aren’t always good for exotics.
In the carnivorous plant community, their sphagnum moss is known for its death-inducing qualities. Most people use coco coir for mushroom casing, which can be a bit expensive but is also reusable. I bought mine from a mushroom supply store because I couldn’t be sure that other sellers didn’t include additives.
It’s also important to wait until the tub is fully colonized, showing a full white mat on top before casing. Not a spot of white here and there, but rather a full layer of mycelial mat. Casing prematurely is part of what cost me my second crop, the Miracle-Gro being the other part. So be patient and choose your casing medium carefully!
Last but not least of my lessons: be careful of the substrate temperature when you inoculate.
Use either a soil thermometer or a thermogun to check that the temperature is around 70F. Too hot will kill the mycelium, and hands aren’t necessarily the best way to test this. Just because you can handle the substrate without incurring 3rd-degree burns doesn’t mean the fungus will be happy!
Learning this cost me my first monotub crop. I now have my third in place, which is colonizing nicely. I used spawn bags that I had handy, so that saved me some money. Oyster species grow well in monotubs, as well as chestnuts and namekos. Wine caps and piopinnos, MAYBE.
On to master cultures!
As I noted above, LC can really add up in cost. Yes, it goes a long way, but why keep buying when you can make your own master cultures? This is a bit of an investment upfront, but it’ll pay off in the long run. You’ll need:
Test tubes, preferably autoclavable and 15 mL, like these. You’ll want the rack and the caps if you choose a different product.
PDA or malt agar. Note that PDA comes in both agar and broth forms. Agar is for plates and slants; broth is for making LC. You can buy pre-poured plates, which I’ve done. Amazon sells them for $2.60 per unit, Northspore’s are $2.20 per. My homemade plates are $0.34 + $0.55/plate = $0.89 each. This is the brew I use.
A wash bottle will make life much easier. Pouring from these is much less messy, but be aware that the agar will gel very, very quickly and clog the bottle. If you’re making slants, I would tip the test tubes to the proper angle while pouring. A slant is used to give the fungi a good surface area to live on while reducing the possibility of contamination. They’ll last in your fridge for about one year. Some say longer. Basically, as long as the fungi have nutrients, they’ll be fine, but you will need to make new cultures from time to time. These are the wash bottles I use.
Some way to measure in grams. A food scale works nicely.
I use my pressure canner and a handy jar to sterilize the nutrients according to the instructions on the bottle. It’s really very easy, so don’t let your mind make it harder than it is! I pour my plates and slants as soon as the canner cools enough for opening. This is because the hot agar will act to negate contamination as well as being easy to pour. Use gloves, though! As I’ve said, it’ll be very hot. The recipe amounts will be given for 1 liter of water. I’ve found that making 1/4 of the recipe fills about 35 tubes. You’ll want to fill the tubes about halfway for a slant. If you’re using the broth for LC, then fill it to about 10 mL. Yes, your bags will colonize with as little as 1-2 mL, but it’ll take longer and increase your chances for contamination.
If, by chance, you don’t pour quickly enough and your tubes have gelled before you set them at the angle for making slants, there is hope!
You can re-gel your agar in the microwave. Use a defrost setting, remove the caps from the tubes unless high-speed projectiles are your thing, and go slowly in 5-10 minute increments. You’ll lose some agar, and your slants won’t be as pretty, but you’ll have learned a good lesson. DO NOT try to put these through another cycle in your pressure canner or run your batch longer than the time given in the instructions. Doing so will hydrolyze the gelling component in the agar, and it’ll gel no longer. Thankfully I learned this last part the easy way, through research.
Inoculating your tubes/plates is also pretty easy.
Remember your aseptic technique and sterilize EVERYTHING. Wipe surfaces, tubes, and your hands with standard isopropyl alcohol. Wearing gloves is good too, and don’t forget to sanitize them!
Hint: make your labels in advance and have them ready to apply. If you’re doing several species, you’ll never remember which tube is which, so do one species at a time and label immediately. Labels should have both common and taxonomic names and dates of inoculation.
Yes, you can write on the tubes, but I find labels more readable. I also inoculate four tubes per species, two each of broth and agar slant. You’ll be able to see colonization in a week or two. You can use the broth to inoculate both grain and sawdust blocks. This can be done inside of a still air box, but honestly, the way we did it in undergrad lab didn’t require that and worked quite well.
Once you’ve wiped everything down, assemble your needle.
Commercial LCs come with a needle, so unscrew the black cap at the bottom of the tube and screw the needle on. Remove the cover from the needle, wipe or spritz with alcohol, and flame the end with a lighter until it’s red-hot. Rest that red-hot end in the agar or broth for a few seconds, so you don’t kill the fungi that are leaving the tube through that opening, then depress the plunger.
I dispense 1-2 mL of LC, whether it’s plate or tube. If you’re making plates, raise the lid only enough to slip the needle into the dish and no more. In both cases, cover right away. An alcohol wipe won’t hurt, either. Plates and tubes can be sealed with parafilm to further discourage contamination. Not cheap stuff, but tossing contaminated items is far more painful! Also, disinfect between species. Between tubes isn’t a bad idea either.
If you’d like a step-by-step on aseptic technique and inoculation, look here. This is pretty much the way we did it in undergrad lab. The only real differences here are lighter rather than Bunson burner and needle vs. inoculation loop.
Lastly, a few gems on Martha tents.
When I set mine up, I opted to use the lower shelf struts as supports rather than using them on top to make a shelf for the fan. This has worked out well somewhat, although I’ve had to use rubber belts with S hooks to give the fan more support.
The plastic of the tent, even with the heavy packing tape I tried, worked for a while, but eventually, the vibration of the fan was simply too much, and more support was required. The other option, of course, is to use those lower struts to make a top shelf for the fan and stabilize the tent another way. Mine is stuck between a wall and my monotub, so that was an option.
I went through some time when just about everything in my Martha tent was becoming contaminated.
Tossing eight bags of substrate and a number of grain jars was really frustrating, so I did some research in my Stamets’ book. It seems that too much humidity will give green molds an edge over the fungi, so I ended up setting my humidity level to 75% with a 5-degree variance. This helped, but I was still having problems.
The Stamets’ book suggested placing an uninoculated Petri dish in the area in question. If the dish grew mold, then the infection was endemic to the environment. Sure enough, my dish turned green in about a week. I pulled everything out and bleached all surfaces, including shelves, struts, and the plastic itself. I’ve been doing this on a regular basis. Problem solved. I wrote more about Martha tents here.
(Want uninterrupted access to The Organic Prepper? Check out our paid-subscription newsletter.)
Have you made your own mushroom master cultures?
Have you tried our mushroom course? Do you have any tips to share or questions you’d like answered? Let us know in the comments below!
About Amy Allen
Amy Allen is a professional bookworm and student of Life, the Universe, and Everything. She’s also a Master Gardener with a BS in biology, and has been growing food on her small urban lot since 2010.


FYI This is the Stamets book I use. It’s called Growing Gourmet and Medicinal Mushrooms: https://www.amazon.com/Growing-Gourmet-Medicinal-Mushrooms-Stamets/dp/1580081754/ref=sr_1_1?crid=2KURBTL822JJ4&keywords=growing+gourmet+and+medicinal+mushrooms+by+paul+stamets&qid=1667397900&qu=eyJxc2MiOiIxLjA2IiwicXNhIjoiMC41MCIsInFzcCI6IjAuNTEifQ%3D%3D&sprefix=growing+medicin%2Caps%2C100&sr=8-1
Except for the mathematical errors on pricing, it was a very nice article.
What errors specifically? Those are the prices from where I source things.
I have that book as well.
if you were interested in growing mushrooms I’d say start by getting that book and reading it cover to cover it is very interesting and the information is presented in a way that is anything but boring.
if you’re still wanting to grow your own decide which substrate you would have the easiest access to be it rye grain wheat straw ground up wood chips from tree trimmers or trees you can cut up into firewood size logs and bury all but 6 inches in the ground
You can even inoculate dead and down timber in the forest just need to know the species of wood and which mushroom to use on it
then purchase spawn from a supplier
I used https://fungi.com/apps/omega-search/?q=spawn*&type=product
Be sure you can tell the toad stools from the mushrooms the toadstools grow real close together because there aren’t mushroom
Eating lots of mushrooms will make you a funji!!
You can purchase spawn but that’s not cheap either. That’s why I prefer to make my own. And it’s really easy to source substrate online from places like Mushroom Media Online. Buying in bulk is cheaper than other alternatives but not as good as free local sources.
I make my own grain spawn and liquid cultures. Much cheaper than buying prepared stuff! Of course I’ve also tossed a lot of green substrate as well. But life is not a perfect process, is it?