
By the author of An Arm and a Leg and The Prepper’s Guide to Post-Disaster Communications
In The Seven Pillars of Wisdom, Lawrence of Arabia notes that by switching to carrying flour rather than rice in their packs, his men were able to carry much more calories with them. Preppers have a special affinity for rice, but are there better options out there for long-term bug-out situations? We’ve talked about this briefly in the past before, discussing non-traditional BOB foods, but what does that look like in practice?
If you incorporate flour into your BOB, how do you use it out in the woods?
Here are two means of using your flour while out in the wild I thought you might be able to glean something from.
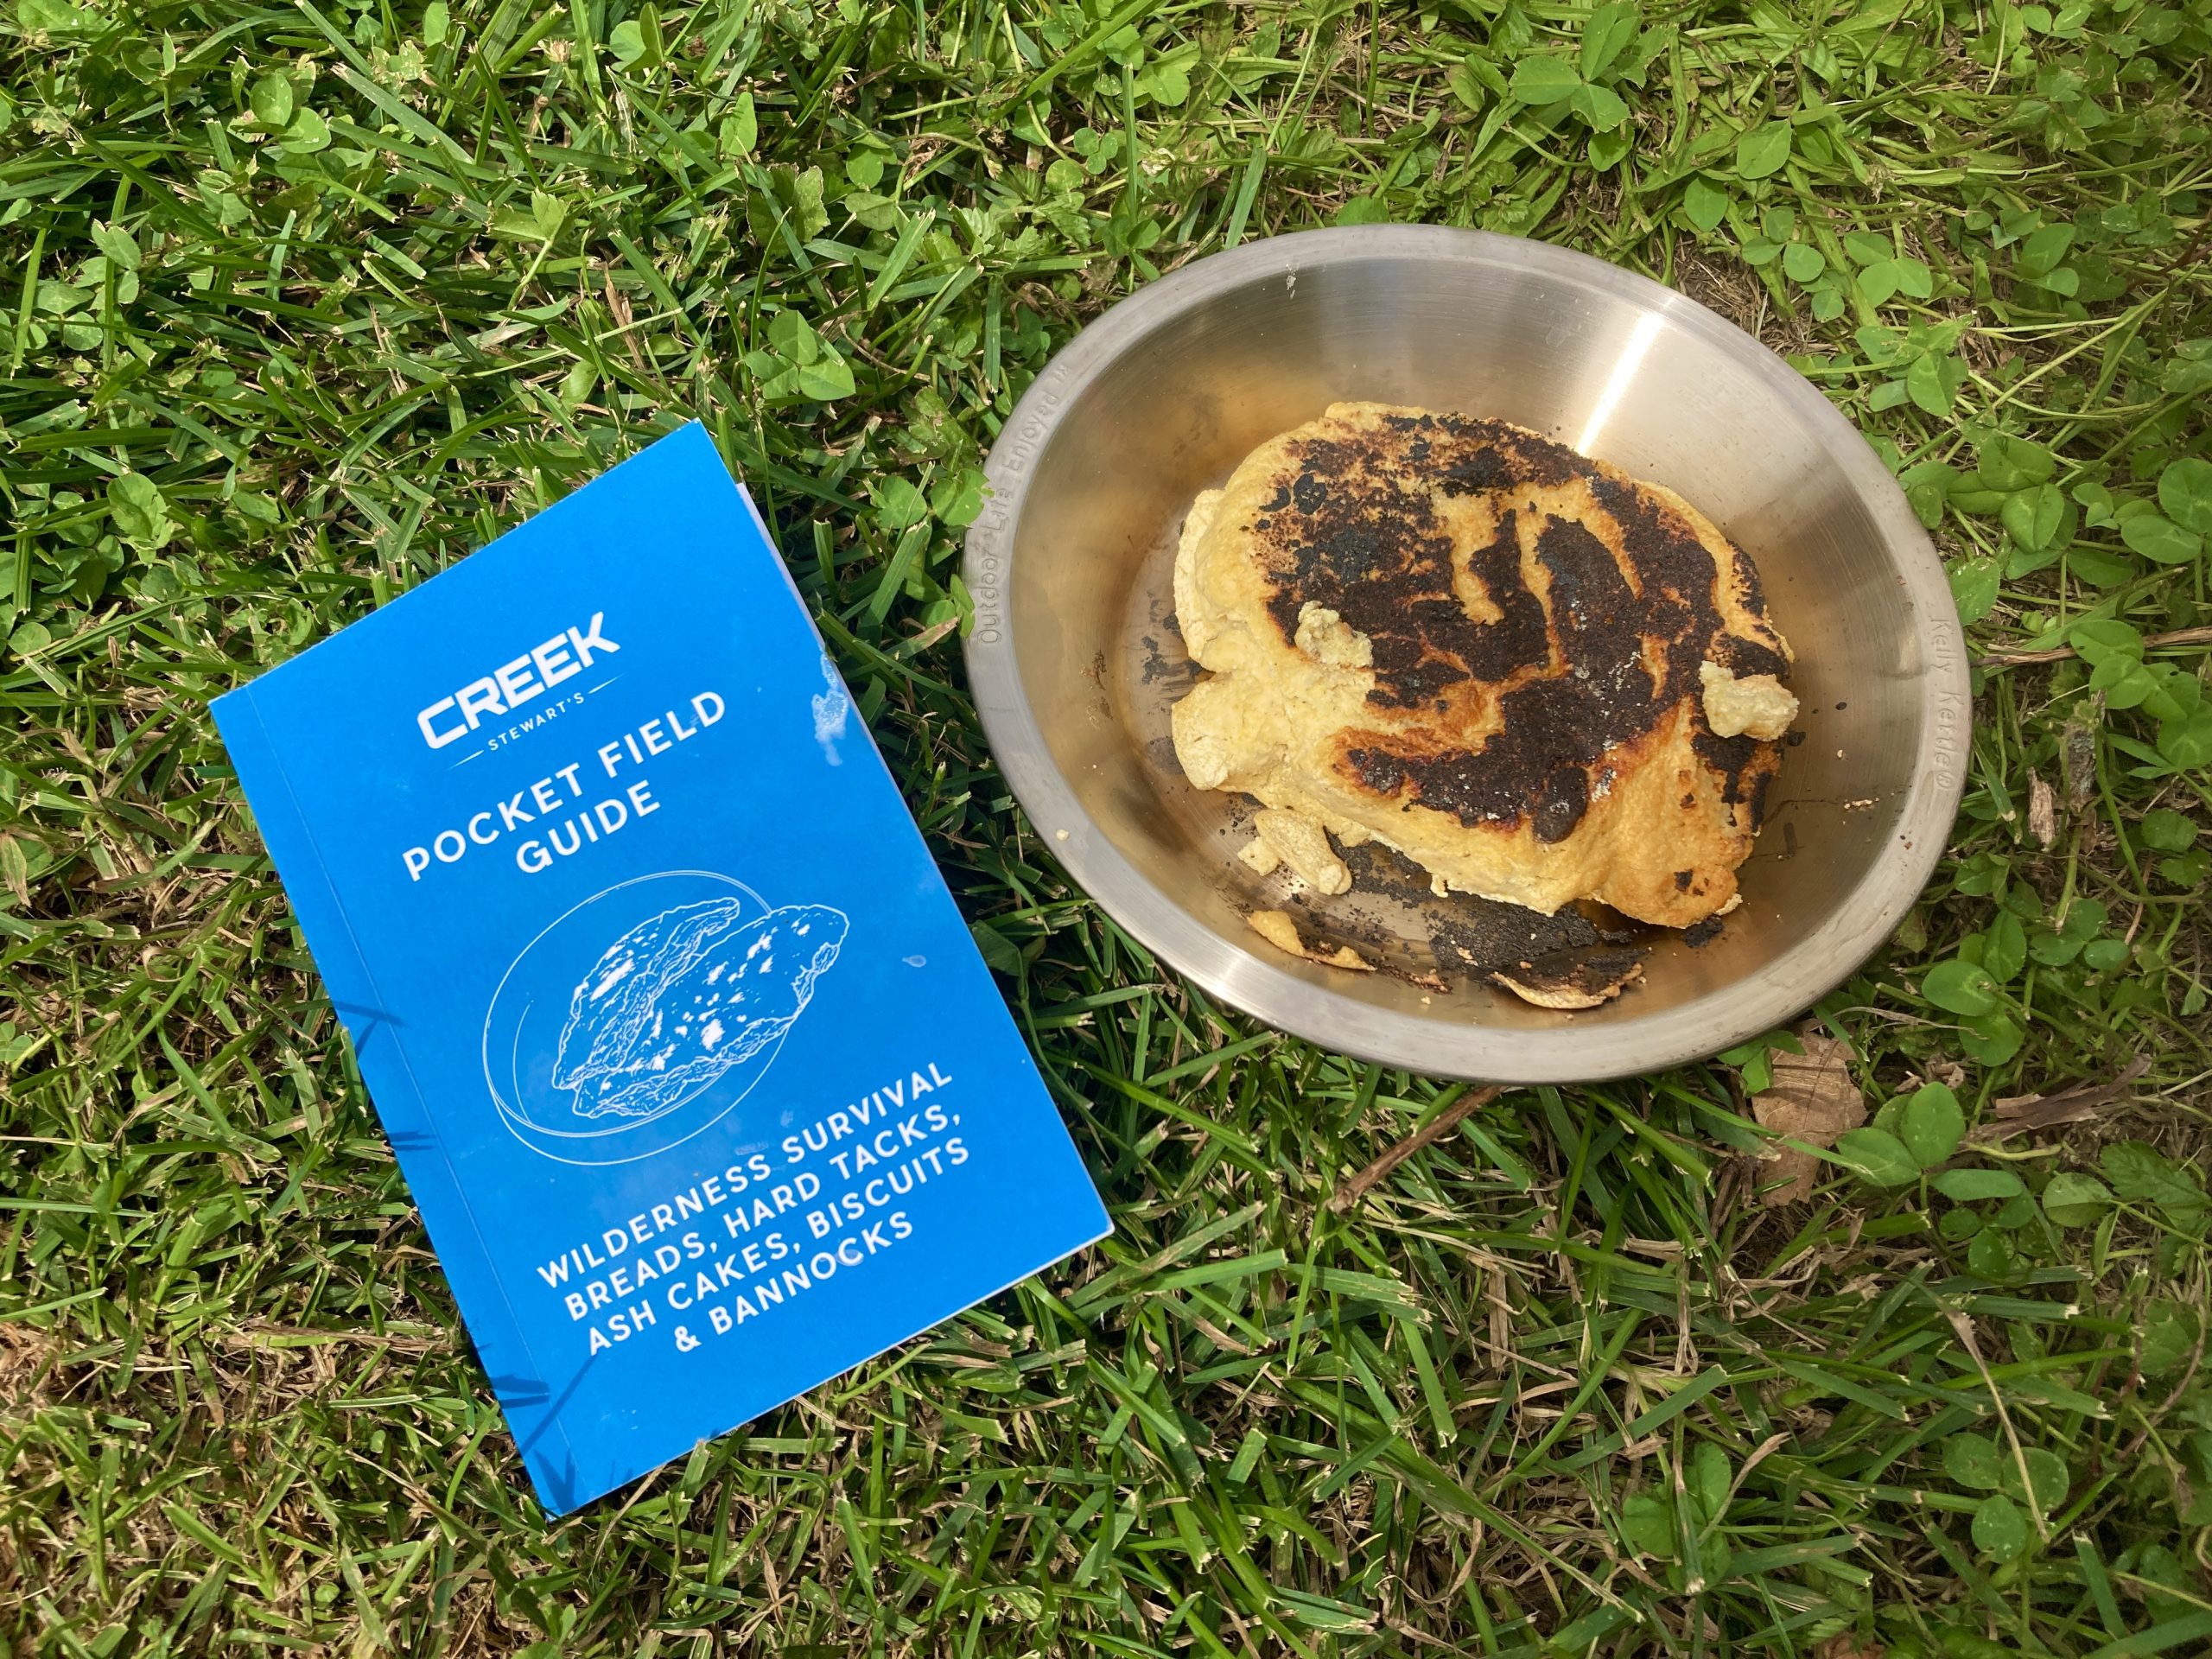
I’ll start by saying that neither of these recipes is my own. I totally stole them from Creek Stewart of “Fat Guys in the Woods” (one of my favorite shows when it aired). He highlights these recipes in his field manual that we’d discussed in the top non-military field manuals post.
How to make stick bread (you’ll need a stick).
This is my favorite recipe of Creek’s. Why? Because it’s as simple as it gets. I don’t really follow his recipes to the letter, so this is my simple spin on stick bread.
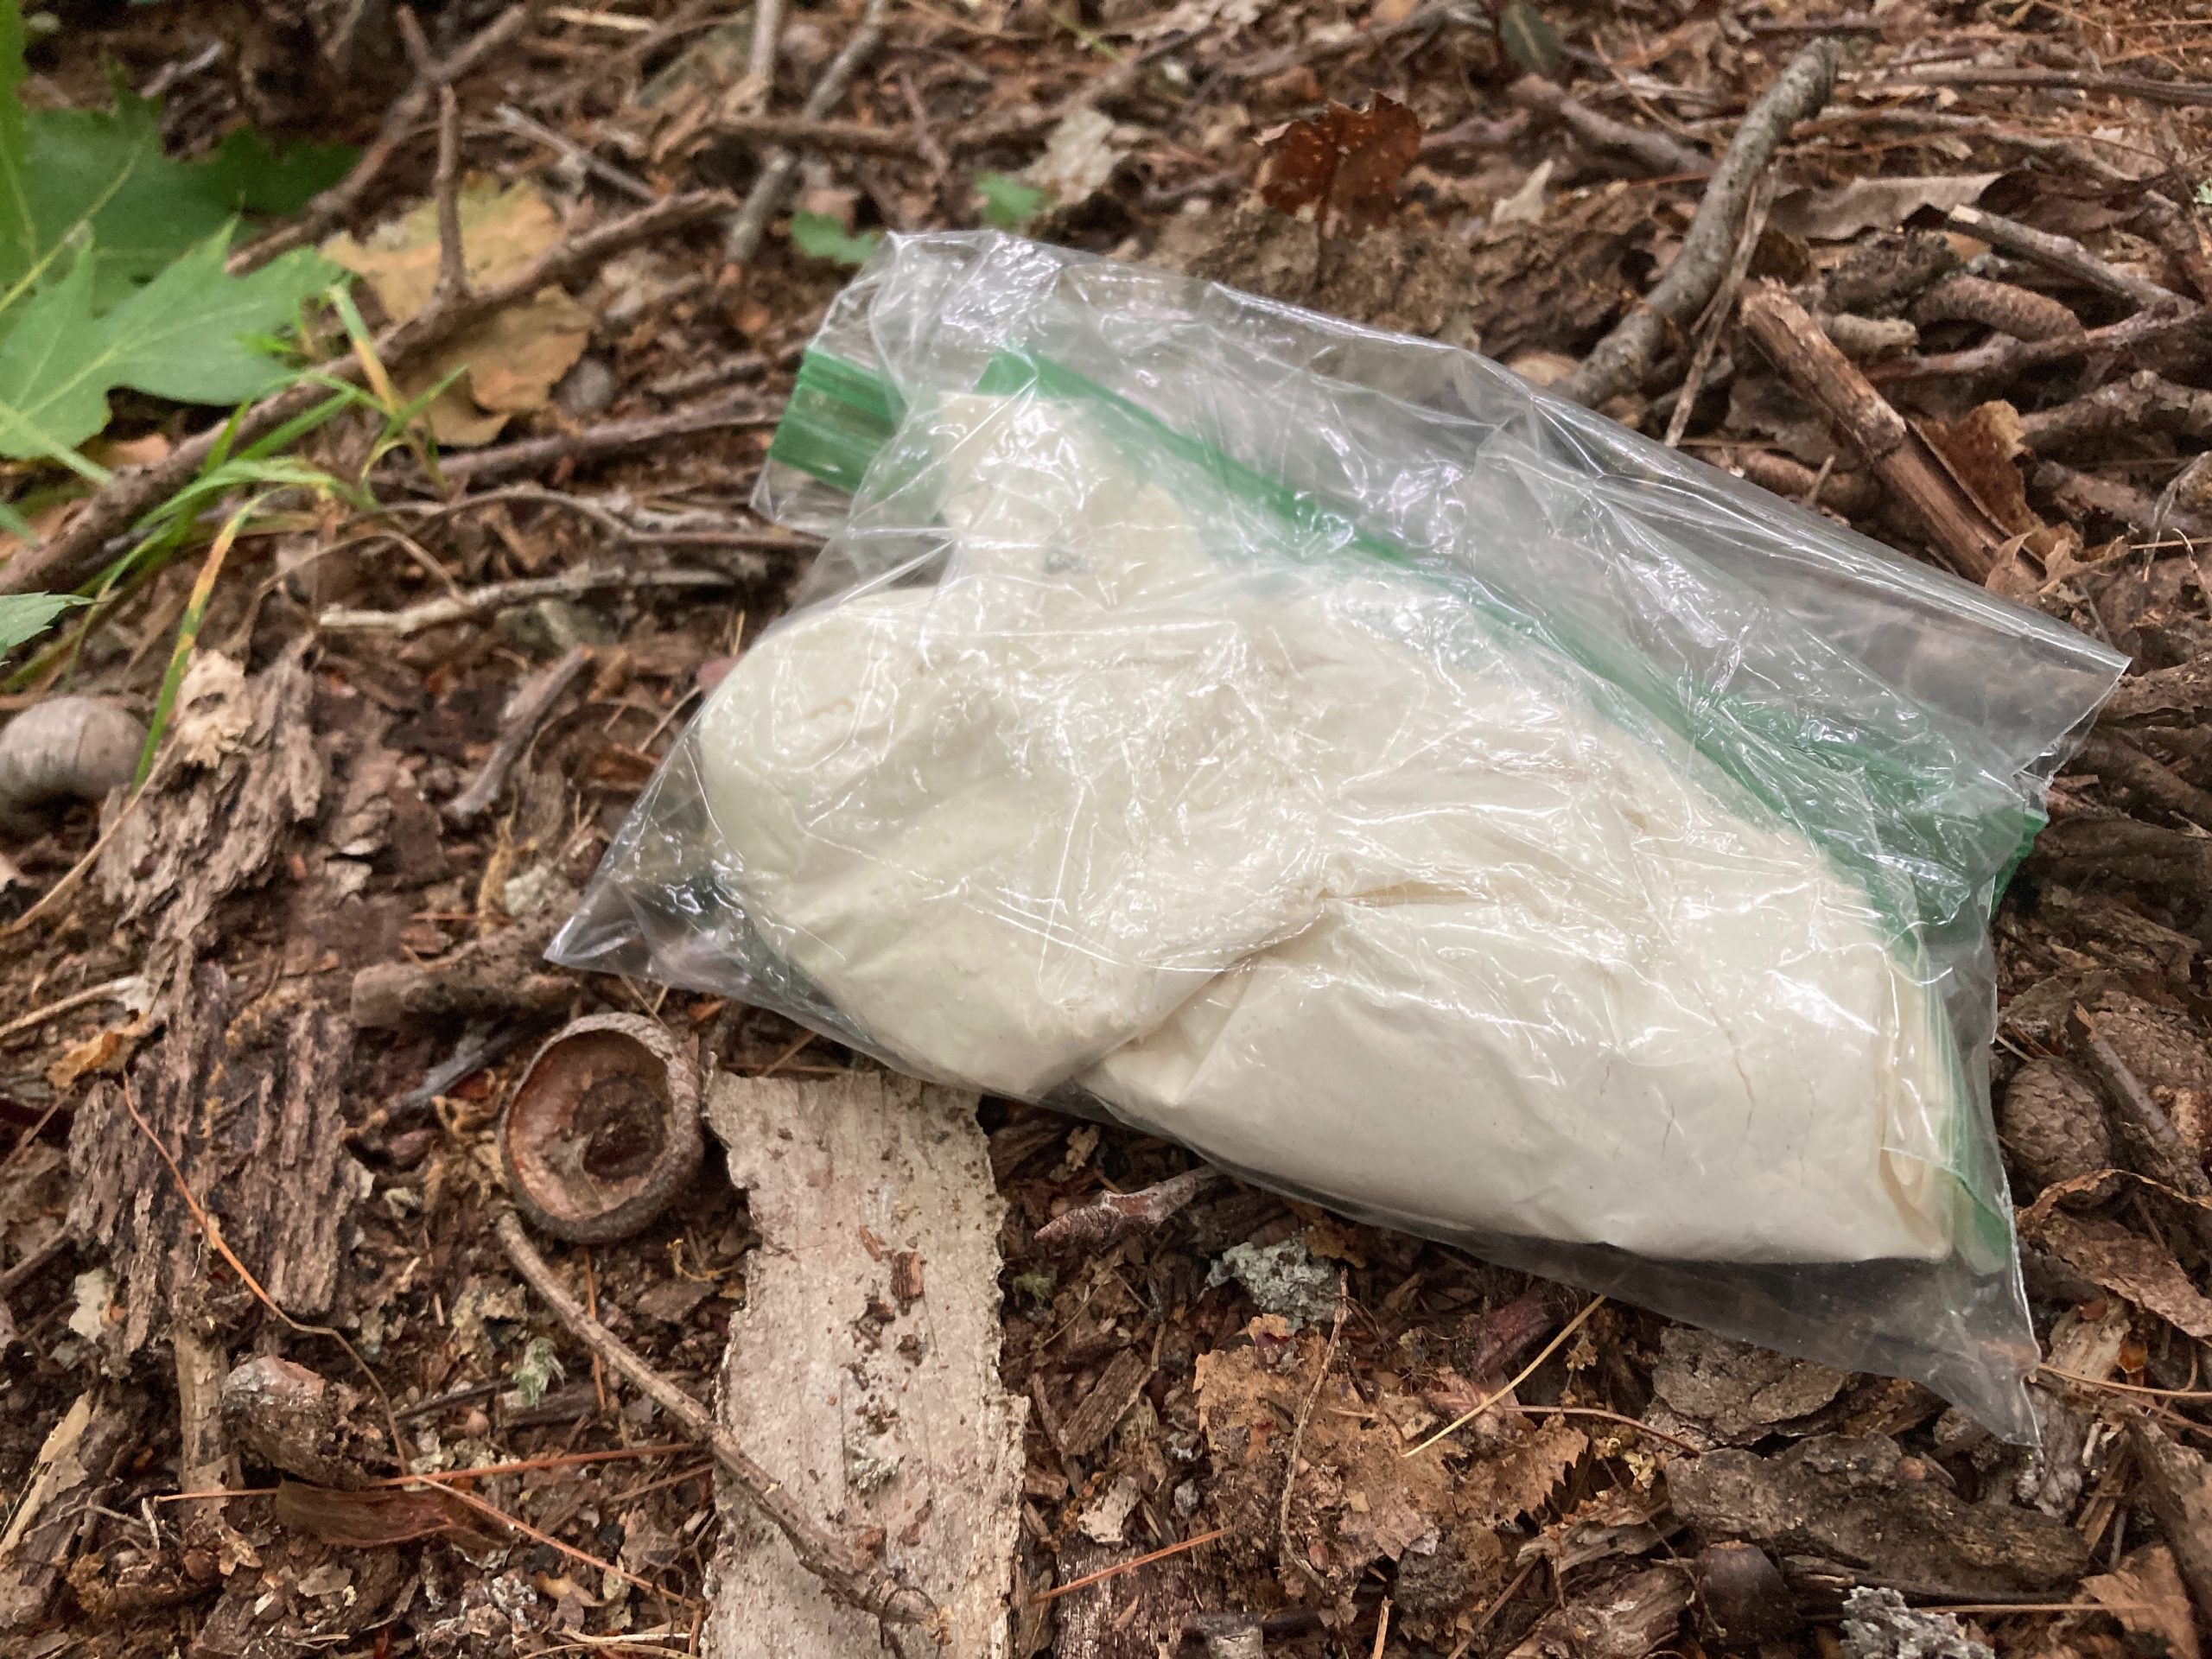
I pack in a Ziploc sandwich bag full of flour. I put the Ziploc bag inside of another Ziploc bag to eliminate spills. Opening up your dry bag after a full hike at dinner time only to discover that there’s flour all over your MREs everywhere is a disheartening experience. That extra Ziploc is your insurance plan.
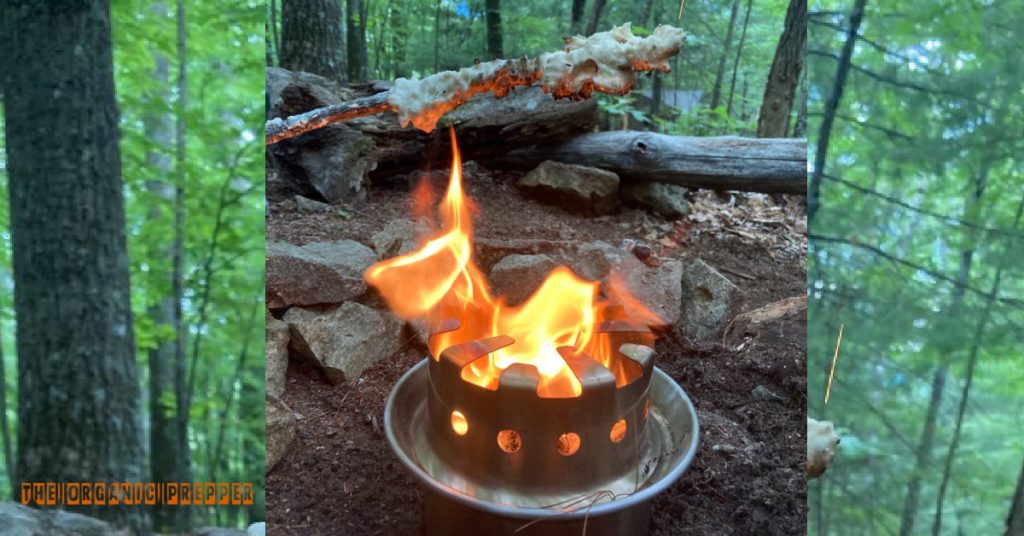
When setup time comes, I build a twiggy fire. That’s just a small campfire. There’s not a lot of signature with a twiggy fire, so if you’re concerned about that, this should help to ease your mind. You can always bake in the daytime if a light signature is a concern of yours as well.
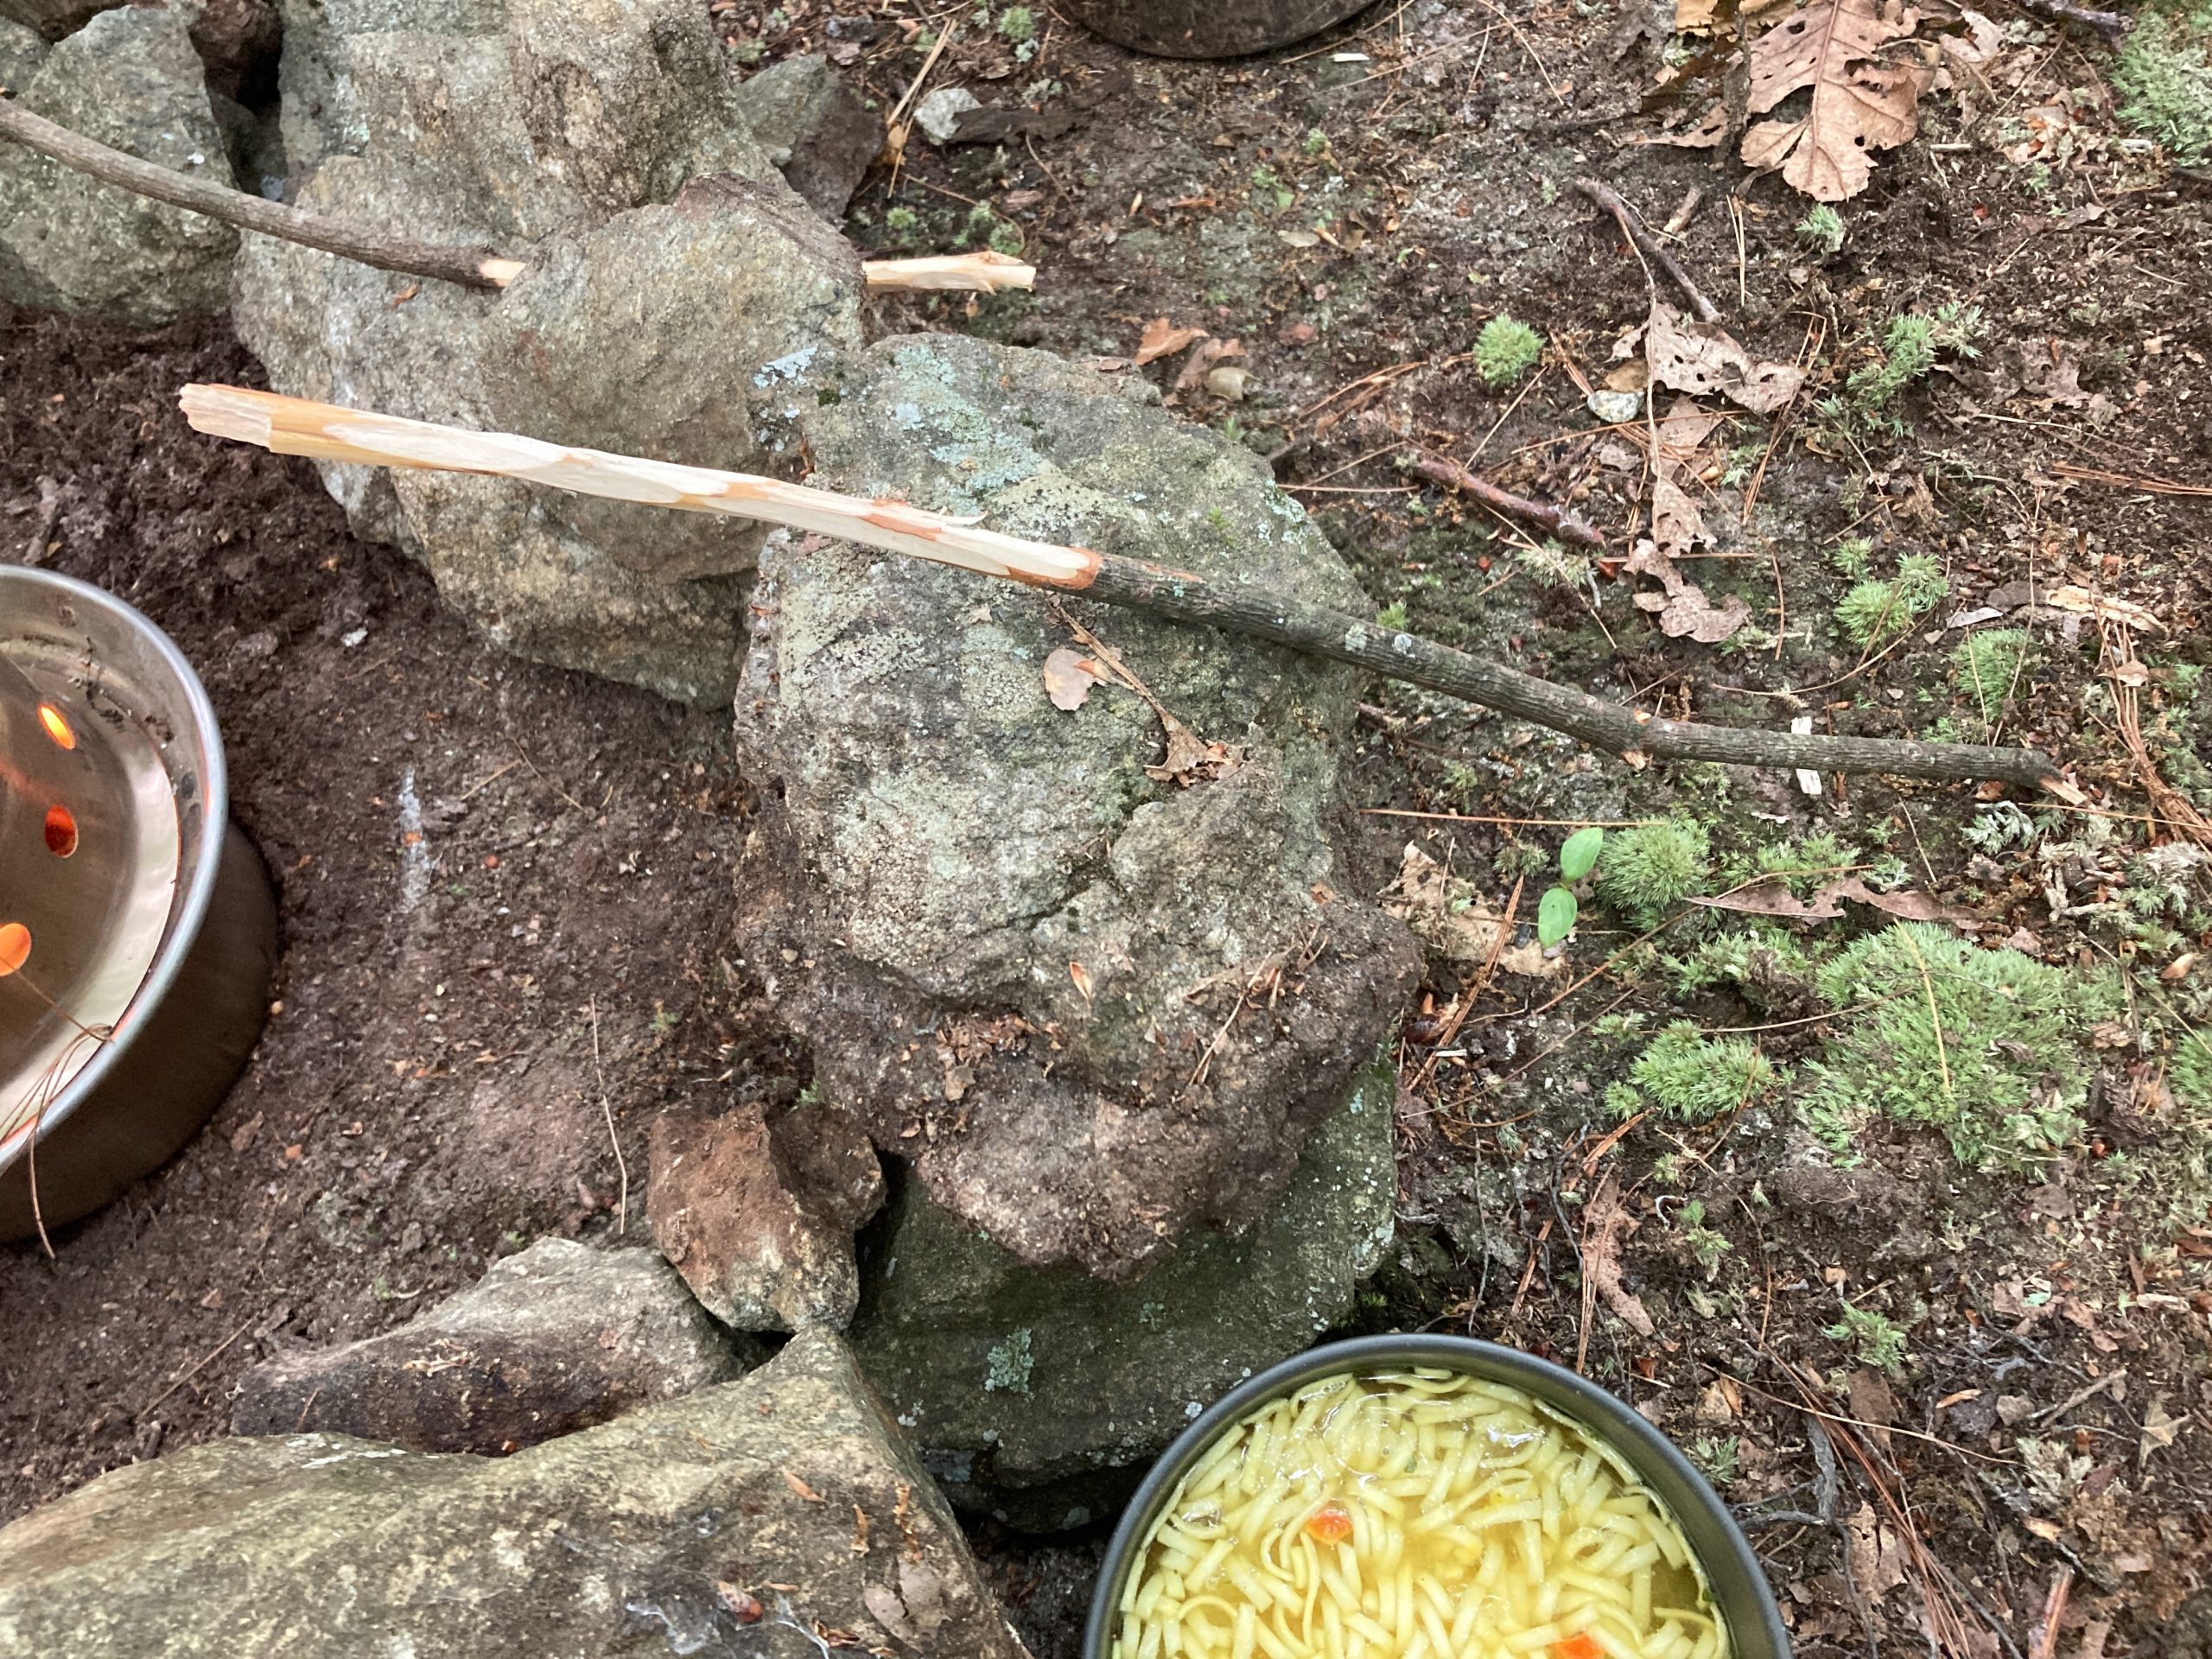
I’m using a Kelly Kettle Hobo Stove in these pictures.
What I do is open up my Ziploc bag, pour in a bit of water until I end up with a dough mixture, and then Play-doh roll a snake/blob and put it on a stick that I’ve carved the bark off of. (My understanding here is that there are some sticks you shouldn’t use for this, but I’m not really sure what they are. Call me foolhardy, but I’ve always just picked a stick and hoped for the best. So far, so good. You probably want to figure this out.)
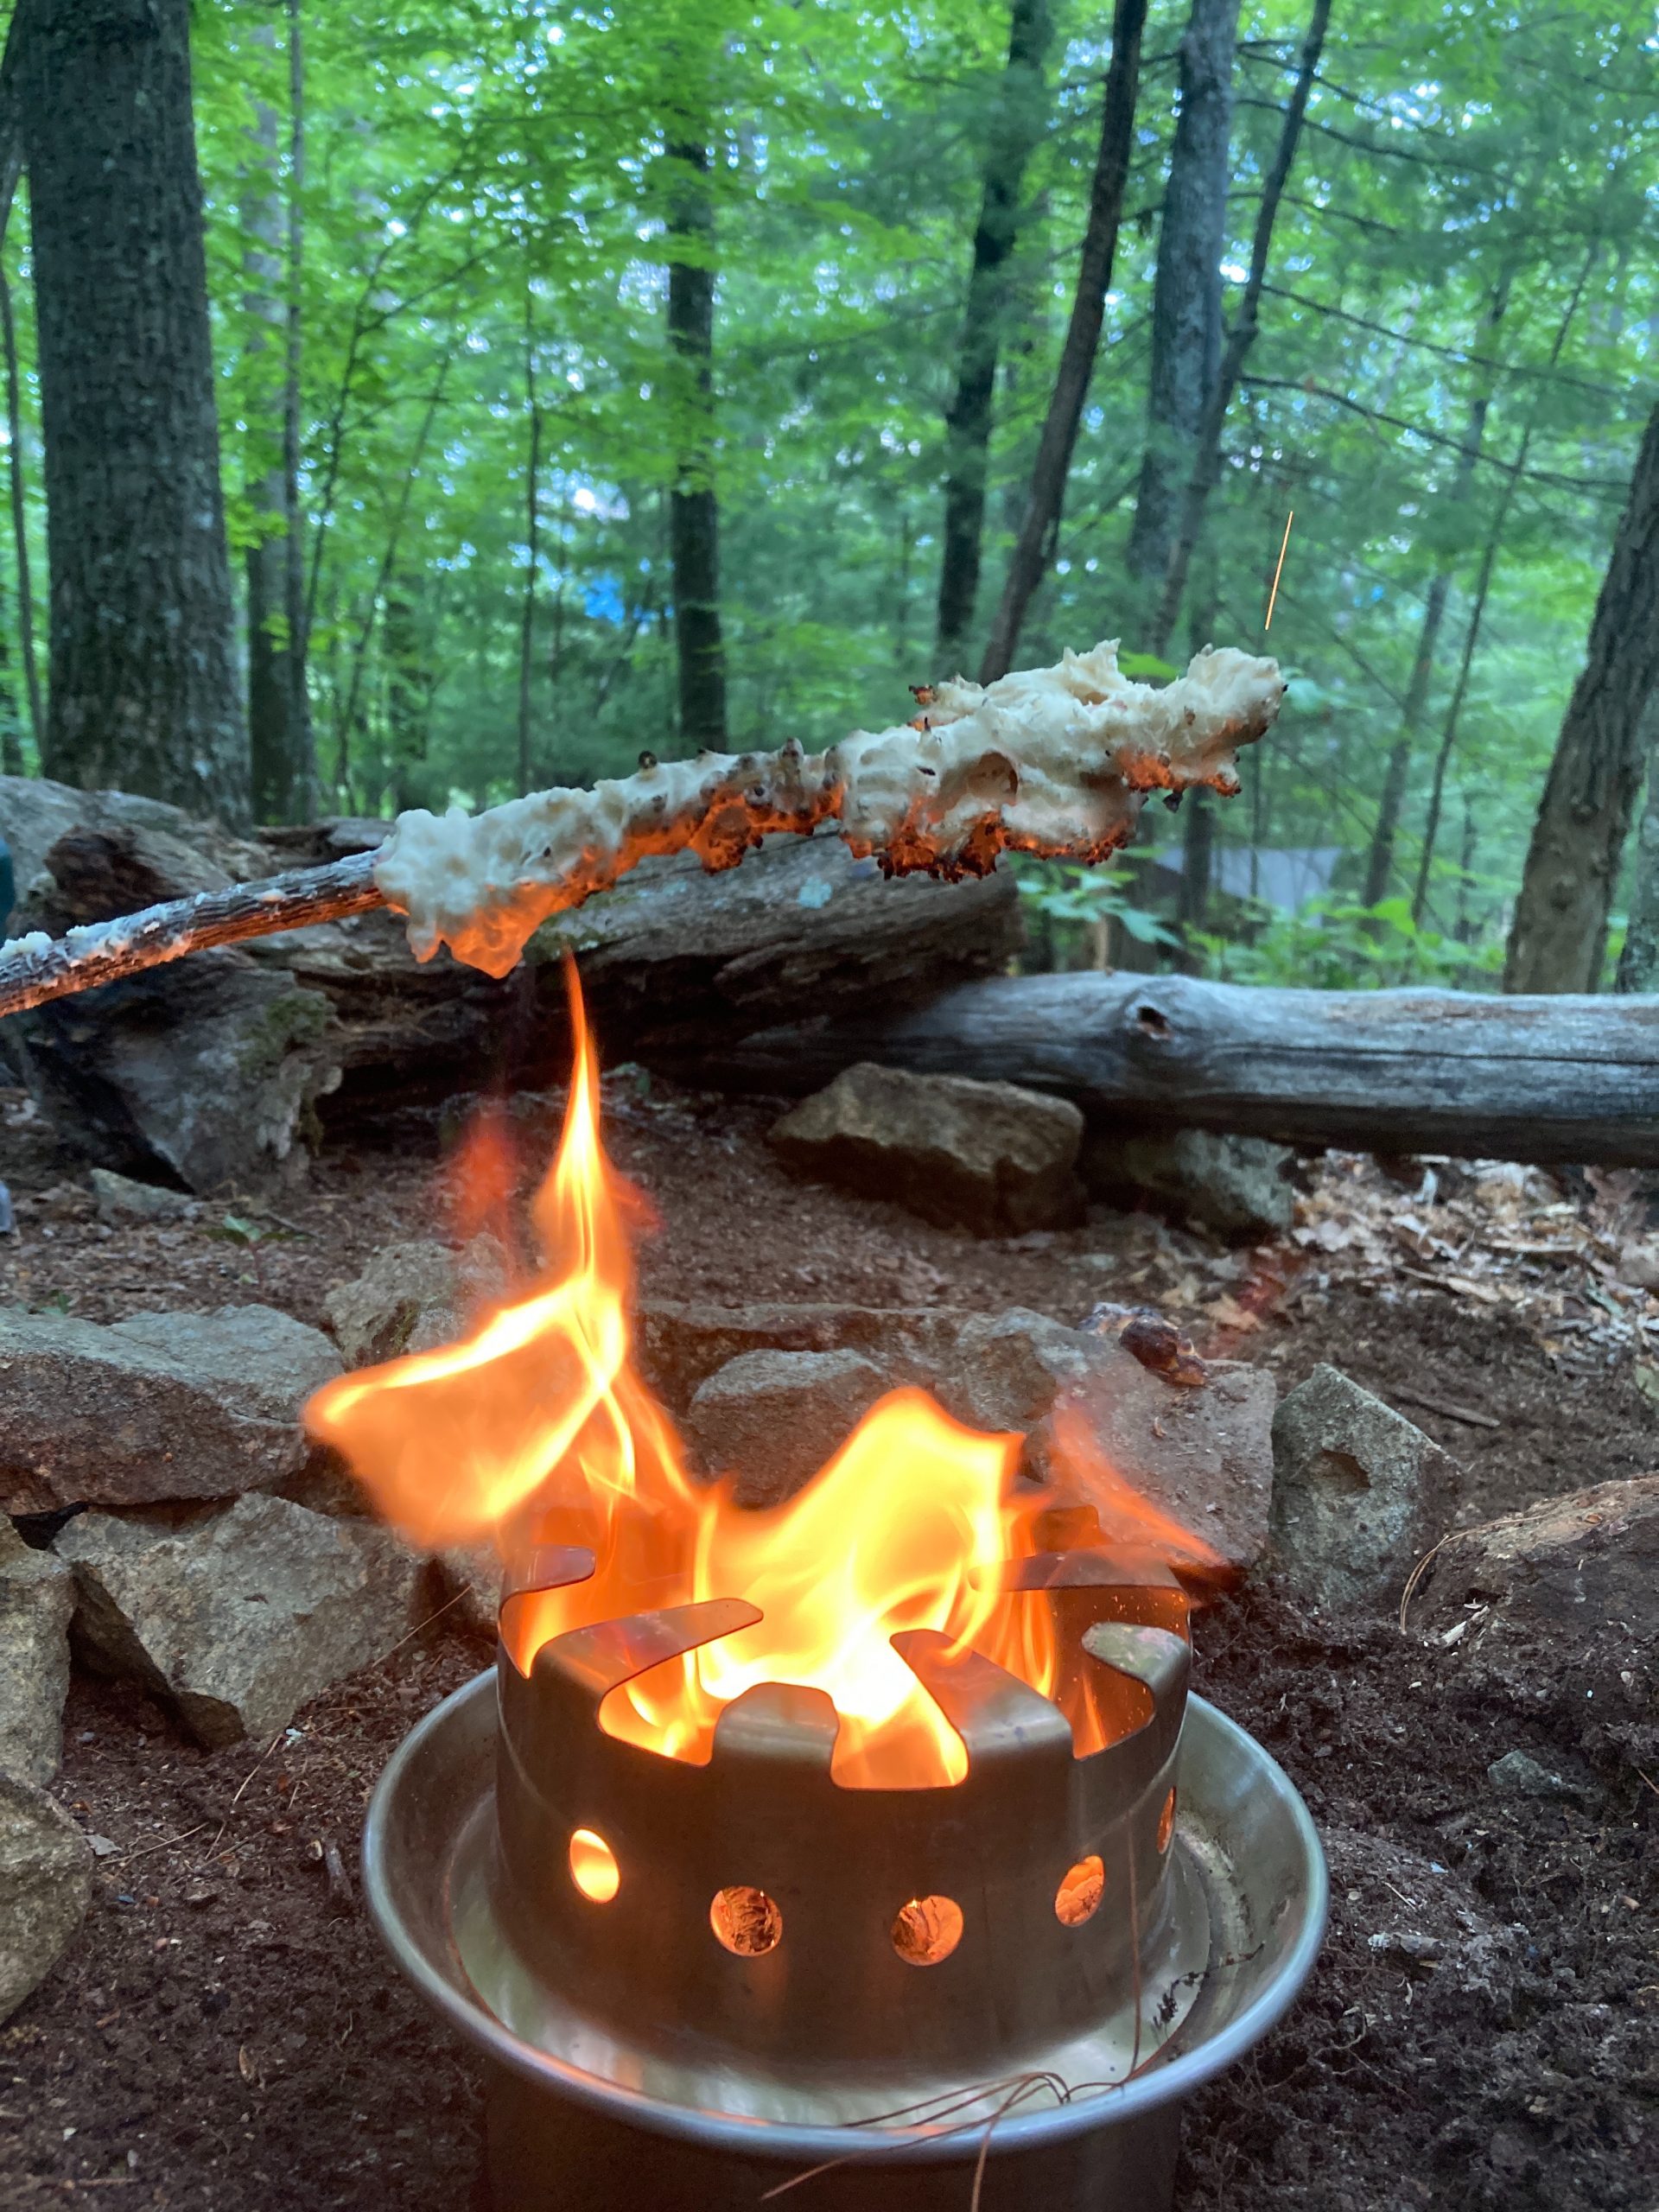
I then hold the dough-covered stick over the fire until it ends up turning into bread. Easy peezy. Creek says until golden brown, but mine always end up tinged with black.
Your hands will be covered with sticky flour mess after this process. I get it off by rubbing my hands together until it all peels off of its own accord. I don’t like going to sleep with bears thinking I smell like a biscuit.
(Don’t starve! Read our free QUICKSTART Guide to what to eat when the power goes out.)
How to make shovel cakes
According to Creek, farmhands used to rinse off their shovels in the creek at lunchtime and then use the spade head as a form of griddle to bake bread. Around here, my shovels are largely used to remove dead critters into the woods, so there’s no way I’m doing that. Even if I heated the spade head over a fire, there’s too much of a mental block there. (“I love opossum-flavored bread!”)
I’ll note that I made this bread off-grid here in the images, but not while sleeping out in the woods as I did with the stick bread images above.
Using my same Ziploc method, I used corn meal to fashion out a little cake on a little steel plate I was using as my frying pan. You do need butter for this recipe. It tastes very bland otherwise. I doubt you’re going to be carrying butter in your BOB, but if you’re at your house when you need to make some off-grid bread, this is something to consider.

All you have to do is let the cake cook on one side until it’s tough enough to be flipped over without breaking into a bunch of pieces. Then, cook the other side for a few minutes, and you’ve made yourself a “shovel cake,” aka a big piece of cornbread.
(Want uninterrupted access to The Organic Prepper? Check out our paid-subscription newsletter.)
Both of these are super simple off-grid bread recipes.
Bread is fairly easy to make, even if you would never consider yourself a Martha Stewart. My version of off-grid stick bread is really nothing more than flour and water. I wouldn’t want to eat it as the main course, but it is very satisfying as a side dish while you’re out in the woods. If you’ve got more Guy Fieri flair than I do, you could easily add in whatever other ingredients and spices to make these dishes more palatable.
The stick bread could easily benefit from some type of herb, something easy enough to add to your BOB. Shovel cakes simply need butter, and they’re delicious. If you can figure out a way to get eggs with you out into the woods in one piece, you have even more options at your fingertips as well.
What are your thoughts on off-grid bread, however? Are there other recipes or methods that you can recommend? Let us know what you’re thinking in the comments below. (Also, if you’ve read Creek’s apocalyptic fiction book, let me know if it’s worth my money.)
About Aden
Aden Tate is a regular contributor to TheOrganicPrepper.com and TheFrugalite.com. Aden runs a micro-farm where he raises dairy goats, a pig, honeybees, meat chickens, laying chickens, tomatoes, mushrooms, and greens. Aden has four published books, The Faithful Prepper, An Arm and a Leg, The Prepper’s Guide to Post-Disaster Communications, and Zombie Choices. You can find his podcast The Last American on Preppers’ Broadcasting Network.


In a cast iron Dutch oven, the mass of the iron helps it cook evenly. A splash of water about halfway through makes a nice crusty bread.
In a clean, empty #10 can with a half brick under the dough and a tin plate as a lid. Again, keeps the flame off the bread, the added mass evens out the heat and prevent that burned onto the bottom of the can effect.
Look at stove top ovens for ideas. Same with over the campfire toasters.
Thank you. That is very helpful.
Michael,
Right there with you about cast iron and Dutch ovens. I have two, and one Camp Dutch Oven.
In the Lodge Cast Iron Cook Book, they describe how to make a “bean hole” to cook in (p. 187). Take clean 55gal drum, cut in half, save lid. Drill holes in it for drainage in case water gets in. Dig a hole large enough for the bottom half of drum. Line the bottom and sides of hole with fire brick. Place three inches of sand in the bottom of the drum to prevent burn out. Place the drum in the hold. Fill in the voids around the sides with sand.
Now you have a bean pole hole.
1stMarineJarHead could you explain the use of the bean pole hole?
Never heard of it?
Michael,
The idea is to use the ground to hold in the heat and make cooking more efficient.
Several Native American tribes, used something similar to slow cook food.
Using a 55gal drum, fire brick, sand, is a more modern version and increasing efficiency.
The Lodge Cook Book does more justice than I can.
I like that idea for a bean pole hole for cooking in. Great for dutchoven cooking! I have several dutchovens from 4 qt to 13 qt sizes. I have several metal 55 gallon drums that were food grade cooking oil shipping containers.
I have in years past cut one barrel in half the long way. Welded a bedframe stand to hold it. Put in a layer of sand or dirt to stop burnout. On top lay a piece of expanded metal for open grilling meats. I baked in my Dutch oven by setting it into the fire and coals. I cut out one end for easier cleaning.
I have also made an oven with flat rock bottom, brick on 3 sides, another flat rock on top. A board to use as the door. Build a fire inside till very hot. Then either rake out the fire or push it all to a back corner to maintain heat. Use as a pizza oven or close up and bake bread and pies in it. Can roast winter squash or pumpkin in it also. Real simple build with flagstone and fired brick. Cinderblock will eventually break and crack from heat.
…The ”evil globalists”” are “”burnin down your food plants”” to ‘starve you’ are create a ‘food crisis’ you better do this right now because your life depends on it
Visit……….. https://zmh87889.Blogspot.com
Either there is enough flour available in your area to make bread, or there isn’t. If there is, it won’t make a huge difference whether you make the bread yourself or not. Bread is cheap. If there isn’t, you won’t be able to make bread.
Doly Garcia have you ever read the story of the Little Red Hen?
Can you grow grass in your area?
Wheat is a grass. I grow my own Pancake patch in my “fallow garden during my annual rotation. The leftover straw from it makes my critters VERY Happy as they root out all the stray wheat and restores my garden. I harvest a 5 gallon pail every year but I’m pretty generous with allowing my chickens to enjoy a fair bit of it.
Now you DO have to harvest, separate the wheat from the straw, separate the wheat from the chaff (AGAIN a well welcomed time for my chickens) dry and grind it but since mankind has been doing that for about ah, 2000 years I’m sure you’ll figure it out.
i agree
very true
The democrat created food crisis is going to hit you hard inthe coming months as more than 100 food plants have been burned to the ground so you have to do this ASAP!!!
Visit……….. https://snnvb65.Blogspot.Com
Is that round fire burner home made, or a purchased item? Looks like something I’ve had in mind, to make, or buy, for a while. heavier than other burners yet still portable. thanks
While I never read “Seven Pillars of Wisdom” I am betting the author was recommending carrying industrially processed grain flour that would have had much of the nutrient removed to keep the flour from spoiling quickly in hot Middle East climates. There was a time in American pioneer days when small hand crank grain grinders were readily available. That meant they could store grains of whatever types for even many years before grinding just enough for current usage. When the Steamboat Arabia went down in the Missouri River after hitting a snag in 1856, it had been a supply ship to many pioneer general stores up river. Decades later after the river shifted and the ship disaster area became a cornfield, the new owners excavated much of the ship’s holdings — including a small cast iron hand crank grain mill — now in the Steamboat Arabia museum in Kansas City.
Contrast that history with a midwest ancestor of mine who in the early 1900s had to transport stored grain via horse and wagon from his home to pay a distant grain mill to turn that grain into fully nutrient-containing flour — which in that pre-refrigerator era could only last about 7 days (at for wheat) in the hot summer before spoiling if his family didn’t use it up first. He clearly didn’t have a hand crank grain mill at home and quite possibly never knew that they ever existed.
So if one is recommending to bring flour with him/her way out in the wilderness, consider whether 1) to bring along industrially processed nutrient-deficient grain flour that might last indefinitely, or 2) freshly ground grain flour with full nutrients but that in hot seasons must be used within a week to keep it from spoiling, or 3) for a much longer (or maybe indefinite) length trip, bring along a small transportable grain mill so you can grind only as much fresh and fully nutrient flour as you need at any time while the rest of that grain can be preserved indefinitely.
I’m pretty sure that Lawrence of Arabia did not offer those options and nutrient choices in his famous book.
–Lewis
Lewis,
Thank you for sharing that.
Very interesting.
Lehman’s has been around for a long time, specializing in off-grid items for the Amish community. https://www.lehmans.com/
They have a very versatile grain mill, but the $529 price tag might make it out of the range of many:
https://www.lehmans.com/product/country-living-grain-mill/
I wonder if grandma’s old hand cranked meat grinder (with a very small outlet plate) could work? This doesn’t have interchangeable outlet plates, but you get the idea:
https://www.walmart.com/ip/Aluminium-Alloy-Manual-Meat-Grinder-Spice-Mincer-Sausage-Press-Grinding-Food-Processor/347339876?wmlspartner=wlpa&selectedSellerId=18988&adid=22222222222562644500&wmlspartner=wmtlabs&wl0=e&wl1=s&wl2=c&wl3=74698224379971&wl4=pla-4578297761286467&wl5&wl6&wl7&wl10=Walmart&wl11=Online&wl12=347339876_10000020145&wl14=meat+grinders+home+use&veh=sem&msclkid=9b14ea8eca701192294d885b1960e8b0
Coincidentally my mom just gave me my grandmothers meat grinder and I was wondering what I could use it for besides meat. May have to test it out.
native Americans ground grains and acorns in worn holes in granite rocks. They used a stone to drink with. Here native people also had a large flat rock and long 2 ” rock to grind with. It was quite efficient for grinding. Those were kept in home. The holes were simple worn intentions in hugh boulders in area where grain or acorns were harvested.
I always enjoy your articles–Thought I was the only Kelly Kettle/hobo stove enthusiast here. Am curious about the ammo can stove used for your shovel bread. Did you build it, or buy it? How about an article showing more photos (so I can make one) of the stove and your review of its strengths and weaknesses. I think your blackened stick bread was just a little too close to the flame. Hard to gauge those things from here, but I bet if you were maybe a foot further from the flame it would have been perfect.
I’ve added a layer of sand to the bottom of a small to medium metal tool chest. Built a fire on the sand and cooked in the metal tray. I sanded off the paint. When done just close the lid on and carried it along in the car. Lol. Be inventive.
If you are going to bring flour in a plastic bag, consider getting a can or two of butter crystals/powdered butter and/or a can of honey powder/crystals specifically to use with corn meal/flour. Add that to the flour portion and shake to blend.
Also, rather than just using a huge blob of dough at one time, consider making smaller, individual drop biscuits that can be easily flipped with a hunting knife or machete. Cuts down on the outside being scorched and the probability of a raw center. Also easier to share.
Or, if you are making a stew or beans or soup in any kind of cooker, you can just drop small flour blobs into or on the stew to make dumplings. They will cook just fine on top of the stew.
Or make tortillas – which is just very flat bread. You can cook these on a hot flat stone if you dont happen to have a shovel. Works well with either wheat or corn flour.
Eggs and butter may both be excellent candidates for freeze drying. I’ve seen freeze dried egg for sale, butter may be also. You could then pre-mix your preferred recipe at home, adding water as needed. Biscuits, griddle cakes, tortillas all sound doable., I’ve never made bread with just flour and water, didn’t know you could.
The “stick bread ” as you call it has for centuries been called BANNOCK , I still use a recipe taught to me in 1967 from a man (born in 1889) that he had used his whole life. It is basically biscuit dough that is pretty “stiff” . I carry my mix in a waxed linen 7″x14″ bag … I roll down the bag and make a depression in the flour and add 1 tablespoon of water then stir to form a ball if needed add more just a little at a time until you have a 2inch ball … stretch out and flatten out to about 1/4 inch thick … wrap around stick … before it can soften ,put near coals to “harden” outside so it won’t fall off … then cut random slits (for expansion) and place back higher from the coals so as not to burn it , turning it often till done.
Another way to bake and cook faster is to make a small reflector oven . I take one with me when I back pack . Can be used as an oven or to cook meat using a ” dangle”.
Aden,
Good on ya with the stick and stuff.
If I got flour, I likely got a cook set I will stick with.
In the past I have made lard bread. Basically add a few table spoons of melted lard to the water and kneed it into the bread. Adds calories too.
Toss in a few beaten eggs, some chunks of left over meat or bacon and make into small rounds. Makes for a small, calorie dense meal.
reading the comments here today has been a wonderful and informative experience. still a bit lost on the 55 gal barrel but it all was such an adventure to read. My thanks to each and all. God bless you richly!
Kefir,
The idea behind a bean pole fire hole is to make a more efficient cooking method. Make one here and now, then you can make food that much more efficiently.
I cannot do the book justice, I recommend looking it up, or buying the book.
Oleander and other poisonous plant sticks should be avoided.
Oleander flowers were used by the ladies of Chareston to poison the Union soldiers!
Black walnut should never be used for a cooking stick or as fuel in a smoker. The tree generates a natural herbicide to keep other plants from competing for nutrients. The wood is poisonous to humans.
Nice article!
For the stick, hopefully you don’t grab yew or lantana…mostly you should be ok, but a troop of Boy Scouts weren’t so luck (or maybe that is an urban legend?)
Another option if you are not bugged out in a woody shaded area is a solar oven. These can be bought or made (videos on YouTube) – basically open box covered in reflective material that angles the light toward a black cooking pot. I own one but yet to test it.
Another classic option is Australian damper. Basically campfire bread, and there are recipes online. Delicious too, I miss it.
While today’s article discusses long term bug-outs, baking with camp fires, and coping with woodland wilderness conditions, the vast majority of the population are urban or suburban based with the prospect of evacuation highways jammed tight with vehicle breakdowns, vehicles out of fuel and the likelihood of cell towers being down during a massive power outage of unforeseeable length. [I’m sure our female readers will be amused at the under-photo caption which reads “That black stuff is what puts hair on your chest.]
While the Kelly Kettle mentioned is a superb cooking tool for the minority who can get to a wilderness wood supply and are experienced enough to cope with it, there are lots of reasons (fire restrictions, lack of wood fuel, etc) why it’s not ideal for urban/suburban survivors. But despite the occasional cloudy days, a cheap portable DIY solar cooker could bake bread in virtually any geography whether bugging in, bugging out, and with or without putting hair on one’s chest.
Since the solar cooking option hasn’t been mentioned above, this link is a good introduction to at least 115 different varieties. Many of them are dirt cheap to build. Some are much more portable than others. The article even has links to retail sources for some.
https://solarcooking.fandom.com/wiki/Category:Solar_cooker_plans#Selected_designs
–Lewis
I have a hand grinder, made somewhere south of the border—all the writing on it is in Spanish. The grinder is heavy, not something to be taken back packing. What I’ve found is that two cups of wheat makes three cups of flour. Secondly, if one grinds the wheat then bakes it into bread the same day, it’s noticeably sweeter than if the flour has been sitting around a while. I’m spoiled, I prefer the bread made from fresh flour.
Another option is to use a Chinese steamer for “baking” the bread. By using steam, that regulates the heat so that the bread is not over cooked. It takes about the same amount of time to steam bread as to bake it. An advantage of steaming, so I’ve been told, is that it preserves more of the protein contained in the wheat. The disadvantage is that there’s no hard crust on top.
Small buns cook faster than a large loaf, so if you have a big enough steamer, fill the shelves with small buns and enjoy.
from this site
https://www.allrecipes.com/recipe/32033/bean-hole-beans/
Beans Cooked Maine Style (in the ground)
The bean hole should be 2 1/2 to 3 feet deep, depending on your pot. The hole should be big enough around to have a 6 inch space between the pot and the edge of the hole on all sides. To help hold heat, put some old tire chains or stones in the hole before starting the fire.
Start the fire and keep it filled with good dry hardwood. Let it burn for about 3 hours. The hole should be at least 3/4 full of hot coals. After the fire has been going for about an hour, place the beans in a large pot, on the stove with water to cover. Bring to a boil and cook until skins roll back when you blow on them, about 45 minutes. Watch closely, because they will get mushy if left too long
Before putting the pot into the hole, remove about 1/3 of the coals using a shovel. Remove and discard any burning pieces of wood. Place the bean pot into the hole, and put the coals from the hole back in around the sides and over the top of the bean pot. Now start filling the hole in with the dirt, packing it down with your feet as you go. You should end up with about 2 feet of dirt covering the pot. Cover the place where the beans are buried with a tarp or piece of metal to keep out rain.
Hemlock and Oleander are two of the twigs you wouldn’t want to use for that. Nice article! I wanna make some stick bread now.
My simple camp breads are made with 1. self rising flour and enough water to make a dough or thinner make a pancake and add a bit of fat of some kind. 2. 3 cups flour, 1/3 cup sugar, 1, 12 oz can of any brand of beer. Mix, kneed if you wish, put in a well greased cast-iron pan with a good lid. Nestle it into the hot coals of your campfire. Pull some coals onto the top or as high up the sides as possible. Bake 30 minutes. If crusty and it sounds hollow when tapped, it is done. If not then give it 10 more minutes and check again. Its a heavier bread but light enough to be good with butter or eat with your soup or stew. I Iike to add dry herbs to it but its great as is. Diced wild onions or a little finely chopped juniper greenery are good. The beer is the levening agent. But a container of soughdough starter could be handy and instead of discarding some frequently use it for daily breads and pancakes.
I have 50 lb bags of wheat, both electric and hand cranked flour mills. Truthfully if you have access to power, wheat berries and the liquid for your pancakes can be blended in a blender till as fine as you wish. Then add your other ingredients. I seldom use syrups because I prefere my home canned fruits on or in pancakes. Peanut butter makes pancakes a substantial meal. I have both regular peanut butter and dehydrated peanut butter. The dehydrated peanut butter can be stirred into the flour mixture with a bit more liquid or oil,, and baked as bread or cookies. My kids liked mashed bananas added to pancake batter. You can add crumbled bacon or and fatty thin cut meat to pancakes and eat that with stews or even make sandwiches.
I grow wild amaranth, rice grass, buckwheat, wheat, a wild bearded rye, and other grains. I store white rice. All seeds that can be ground into flour. Just remember not all have gluten that makes the typical kneeded dough. White rice will make a yeast bread but doesn’t have gluten. So it handles more like a quickbread batter rather than the dough for wheat bread. In fact it can be made with baking powder, salt, and a bit of oil like any quick bread.
The Coleman collapsible stove top oven is about as reliable and easy to use as they come.
I don’t know how long they have been on the market but I recall the old timers using them in
deer camp over sixty years ago.
All that is needed is fire whether from a camp stove or camp fire.They have a dial thermometer in the door which must be watched constantly.If you have a rocket stove it will
be easier to reach the proper temper and to keep it there.(Eco Zoom has great rocket stoves).They will burn almost any wood.Small pieces like twigs and pine cones are best.
We bake the small boxes of Jiffy Buttermilk Biscuit Mix in 8 by 8 disposable pans from the
Dollar Store.The mix requires only water to make drop biscuits.
We have used our Coleman oven during power outages both on the propane cook stove and
on the rocket stove.
Try it and you won’t be disappointed.
As I sail through the South Pacific my bread supplies and biscuits came to an end. Wondering how I could conveniently make bread I remembered my grandma making ‘puffed aloons’ or fried scones. There is no hard recipe as such – self raising flour-enough for your immediate meal requirements do about half a cup for one person.
A teaspoon of milk powder, salt to your taste. A small amount of vinegar in a 1/4 cup of water. My wife says this causes the baking soda in the flour to bubble.
Add enough water to the mixture to make a stiff wet dough that will stand up but not slump.
Heat up oil or fat in a frying pan and spoon a sizeable amount to create the biscuit size you’re happy with. Fry till brown then flip and fry the other side.
My grandma used to dust it with sugar but I cut a slot and insert cheese, or use it as a bread base for bacon and eggs. It is very versatile but perhaps not high in the nutritional ratings. Who really cares when it is a stop gap measure. Sure it eventually killed poor old grandma but she had a good 96 years before she passed.