
For more information, check out The Herbal Skills Intensive.
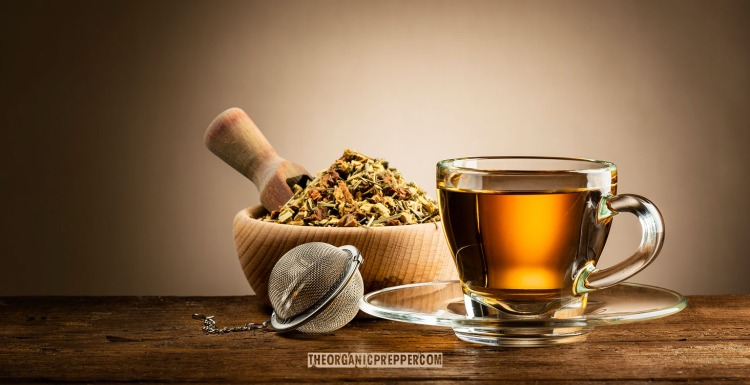
[Originally published at HerbalPrepper.com] This tea is one of my favorite cold and flu season remedies. I make it every year, tweaking it a little bit each time. I make this in large batches in September in anticipation of cold and flu season.
Around the house, I nicknamed it “herbal-tussin tea.” Since it addresses common respiratory symptoms and not any specific infection, I’ve renamed it “Respiratory Relief Tea.”
I have also updated this recipe to allow for more effective tea-making techniques. It blends cold infusion, hot infusion, and decoction preparations.
Relief for common respiratory complaints
The herbs in this tea are a blend of expectorant, decongestant, diaphoretic, analgesic, immunostimulant, and demulcent herbs. This will support your body as it heals from a respiratory infection by:
- Making coughing more productive and easier.
- Supporting natural immune response.
- Soothing irritated mucosal tissues.
Methods used
This preparation is a bit more involved than my previously published respiratory tea recipes. Once you get the hang of it, it’s really not that hard.
Subscribe to our newsletter
Trying to figure out how to stock up while prices keep climbing? We can help with our free guide and newsletter!
This tea utilizes three different water extraction methods:
- Cold Infusion
- Decoction
- Hot Infusion
Cold infusions are made by steeping herbs in room temperature water for 4 to 8 hours. I tend to make them in mason jars, filling the jar 1/4 of the way. Then I fill them with water and secure the lid.
I tend to use wide-mouth jars for ease of filling and emptying the jars. I also use left-over lids from canning or these reusable, plastic lids.
Decoctions are made by simmering hard plant material, such as roots and bark. To 4 cups of water, add between 1/2 and 1 cup of herbs, depending upon your needs and how concentrated you want your end product. Add the herbs to a pot of cold water, bring to a boil, then reduce to a simmer. Allow to simmer for 20 minutes, and the water will have been reduced by half. Strain and the resulting liquid is your decoction.
Hot infusions are made by steeping delicate plant parts, such as leaves and flowers, in hot water. I use anywhere from 1 tablespoon up to 4 tablespoons per 1 cup (8oz) of water, depending upon how strong I want the end result.
Measurements
I have listed the ingredients by volume, not by weight. For example, I measure by cup, not by ounces. So, 1 cup equals 1 part.
If you want a smaller batch, use a 1/2 cup or an even 1/4 cup to represent your measurement of “1 part”, and maintain the ratios throughout.
Weighing everything would be more precise, but I haven’t found weighing everything out to exact amounts to matter much with this tea.
(Need more information on what to eat when the power goes out? Check out our free QUICKSTART Guide.)
How to make respiratory relief tea
Follow the instructions below on how to make the Cold Infusion Phase, the Decoction Phase, and the Hot Infusion Phase.
Here are the steps to combine the phases:
- Make the cold infusion phase first.
- Use the resulting liquid as the water for your decoction.
- Strain out the herbs and reserve the liquid.
- Reheat the decoction (the liquid) if needed to just before boiling.
- Add the herbs for the hot infusion, turn off the heat, and cover.
- Allow herbs to steep covered for at least 15 minutes.
This takes a bit of time from beginning to end. I suggest making it in larger batches once a day and reheat just before consuming.
Honey is a perfect addition to this tea, as it helps to both sweeten the tea and to relax coughing. If you are diabetic and cannot have honey, you can sweeten your tea with something like this monkfruit-based syrup.
Respiratory relief tea- cold infusion phase
Ingredients
- 3 parts slippery elm
- 1 part marshmallow root
- 4 parts room temperature water
Directions
- Combine slippery elm bark and marshmallow root
- Cover with the water, and allow to steep at room temperature between 4-8 hours.
- Strain, reserve liquid, and discard the plant material.
- Store cold infusion in the refrigerator for up to 2 days if needed.
- Use this as the water for the decoction phase.
There are concerns with slippery elm, as it is an endangered wild plant. If you can, buy organic. That should ensure that it came from a managed population, not from a wild population that might have been overharvested. Otherwise, feel free to substitute Siberian elm instead, or just use 100% marshmallow root.
A quart mason jar will allow for 1 cup of plant material and 4 cups of water. This is the correct ratio of plant material to water, and the jars have easy-to-read measurements on the side of each jar.
Use cut and sifted instead of powdered forms. Powdered slippery elm and marshmallow will be much more difficult to strain out. It’s a mess. Ask me how I know.
Decoction phase
- 2 parts elecampane root
- 1 part clove
- 1 part licorice root
Blend these herbs together, and then use:
- 1 part decoction herbal blend (above)
- 4 parts cold infusion (Cold Infusion Phase above)
Add all ingredients to a pot. Bring to a boil, then reduce to a simmer. In about 15-20 minutes, the liquid will have reduced by half. Strain out the plant material, and return the liquid to the pot.
Please note, you will have slightly less than four parts of your cold infusion after straining out your herbs. I just add extra water to make up the difference.
(Want uninterrupted access to The Organic Prepper? Check out our paid-subscription newsletter.)
Hot infusion ingredients
Blend the ingredients below. It will make a lot, so you’ll only have to do this step again when you run out.
If you are using 1 cup = 1 part, you will end up with 13 cups of herbs. You will use 1 cup (1 part) of the blend each time you make the entire Respiratory Relief Tea recipe.
- 6 parts hyssop flower
- 3 parts mullein leaf
- 1 part colt’s foot (aerial parts)
- 1 part speedwell
- 1 part spearmint leaf
- 1 part thyme leaf
Once you have returned your decoction to the pot, bring the liquid to just before boiling. Turn off the heat and add 1/2 cup of the herbal blend. Cover and steep for 15 to 20 minutes.
Strain out the plant material, add a sweetener (optional) and sip the tea as needed for relief from respiratory symptoms.
Herbalist notes
Here are some tips and tricks to keep in mind.
If you are dealing with seasonal allergies, add some goldenrod and nettle leaf to the hot infusion phase.
If you are dealing with a spastic cough that makes the muscles of your torso hurt, add some cramp bark to the decoction phase.
There are a lot of ingredients here. If you cannot find something, you can leave it out or substitute something else. The only parts I would not change are the hyssop, marshmallow, and clove. While everything in this blend is important, those are the ingredients that really make this recipe work so well.
Want even more?
For more herbal and preparedness information, be sure to check out these books and this course.
- The Herbal Skills Intensive.
- Prepper’s Natural Medicine: Life-Saving Herbs, Essential Oils, and Natural Remedies for When There is No Doctor
- Prepping for a Pandemic: Life-Saving Supplies, Skills, and Plans for Surviving an Outbreak
About Chris
Chris Hayes is a lifelong prepper and survivalist from rural Maine. Due to extreme weather, preparedness is built into the lifestyle of many Mainers. The Hayes family are no exception. They live off-grid, enjoy hunting and fishing, bushcraft, beekeeping, and making their own herbal medicines. When not tending to the homestead, Chris spends time practicing martial arts.


13 Responses
A very good recipe. Thanks.
You’re welcome.
Thanks Chris, I enjoyed your article.
Thanks. Glad you liked it.
Sounds like a good recipe. I will have to eliminate or change a few ingredients due to allergies. Remind people to either get an updated allergy test before sampling various culinary/medicinal herbs or do a skin test before drinking. For one I am allergic to Marshmallow, and sensitive to chamomile.
You might try more slippery elm and eliminating the marshmallow, then. What you’re looking for here is a demulcent herb.
Great article! I like the careful description of the various processes needed. If a person doesn’t have those herbs and needs something to relax the lungs, peppermint has some helpful properties, including some bronchiodilation. I use it when I have mild asthmatic symptoms. I mention it because peppermint herb is a ton easier to find and grow than most of the stuff on that list. The “herbal tussin” looks really great and effective and at some point I’d love to try making it. I’ll bet it works better than most of the crap sold over the counter.
My favorite cheap, simple cough remedy is a few drops of peppermint essential oil, vodka, honey and a little water. I shake it up well and take it in very small sips, inhaling deeply after doing so. For me at least, that helps.
I also make my own “vicks” by mixing 5-10 drops peppermint oil, 5-10 drops eucalyptus oil, and 3-5 drops tea tree oil with a good dab (a tablespoon or so) of my favorite salve base.
To make salve, I gently heat either coconut oil, or a mix of beeswax and olive oil, in hot water or a microwave. Once liquid I add my essential oils. I dab a bit of the mixture under my nose (not inside) and take a hot shower. Helps open the nasal passages. Also good for keeping my nose open when I’m going to sleep.
Thanks. The methods used to make a remedy are important to get right. Glad you found the explanations helpful.
I ❤️ Your article and have a friend herbalist who has many of the ingredients but not all. Looking to get a lbs of slippery elm and a lbs of marshmallow root costs $80. where do you get your herbs ?
I grow and wildcraft a lot of what I use. I do order from Jean’s Greens in NY. Better on shipping to my neck of the woods.
Love your article, Chris, my wife is into apothecary. I read about jewelweed in one of her 16th century grand j ations, I think it was English, not Persian? They recommended burning it and breathing it in. Does that sound right to you? She hasnt texted me back yet.
I’m not sure what you mean by English or Persian. But, I primarily use jewelweed for poison ivy topically.
That sounds like a wonderful remedy. Nice tips, too.