By the author of I Hope the Apocalypse Has Comfortable Seating and The Widow in the Woods
Hey there, Pumpkin! Yeah, I’m talking to you.
One of my fall favorites is PUMPKINS. Not only are they adorable (I really, really think they’re the cutest thing in the garden), but they’re also tasty and nutritious.
And right now, a week after Halloween, you can get them for a song in a lot of different places.
See what’s going on at your local pumpkin patch. Look for them at the grocery store when you do your shopping. Make a stop at the “fancy” grocery store in your area to find heirloom pumpkins at deep discounts. After Thanksgiving, you may be able to get even more pumpkins, but around here, I haven’t had much luck with that.
Here’s some pumpkin trivia.
- Pumpkin is part of the Cucurbita family, which also includes cucumbers and squash.
- They are botanically classified as fruits, not vegetables.
- Early American settlers made a version of pumpkin pie by hollowing out a pumpkin and filling it with milk, honey, and spices, then baking it in the ashes of their cooking fire.
- Although the classic pumpkin is orange, there are heirloom varieties that are green, yellow, red, white, blue, and tan.
Don’t waste pumpkins just for decor.
Pumpkins are commonly used for decor in the autumn, from Halloween right on through Thanksgiving.
Take Halloween, for example. When my kids were younger, we were far too broke to go out and buy pumpkins to carve and then just allow them to rot on the front porch.
Subscribe to our newsletter
Trying to figure out how to stock up while prices keep climbing? We can help with our free guide and newsletter!
Instead, we chose our pumpkins and painted designs on them with craft paint. (The thick rind protected the edible stuff inside.) Then, if we did end up carving, we did so the night of Halloween right before we went out trick-or-treating. When we got home, I brought the pumpkins inside, washed them, and processed them immediately.
Later, when we had livestock (and a bit more money), we could feed the carved pumpkins to our animals. Chickens just love going at a pumpkin or squash that already has a hole in it. They went absolutely wild for jack’o’lanterns.
Lots of folks also use pumpkin as decor on their tables and by the front door for the entire autumn season. If you plan to do that, watch to make sure your pumpkin isn’t rotting so you can use it up.
It just seems incredibly wasteful to me to buy something that provides that much food and then throw it away. If you’re wondering what to do with all that tasty orange goodness, then read on!
Choosing, Washing, and Storing
Many heirloom varieties will provide far more pumpkin inards than smooth-skinned classic orange varieties.
Always wash pumpkins well before slicing into them. This will help to prevent any insecticide that may have been used from being introduced to the flesh inside the hard shell. And who knows what happened to your hapless pumpkin when it was sitting there innocently on your front steps. I usually do a scrub with antibacterial dish soap first, then I rinse it and spray it with white vinegar for one more scrub before rinsing a final time.
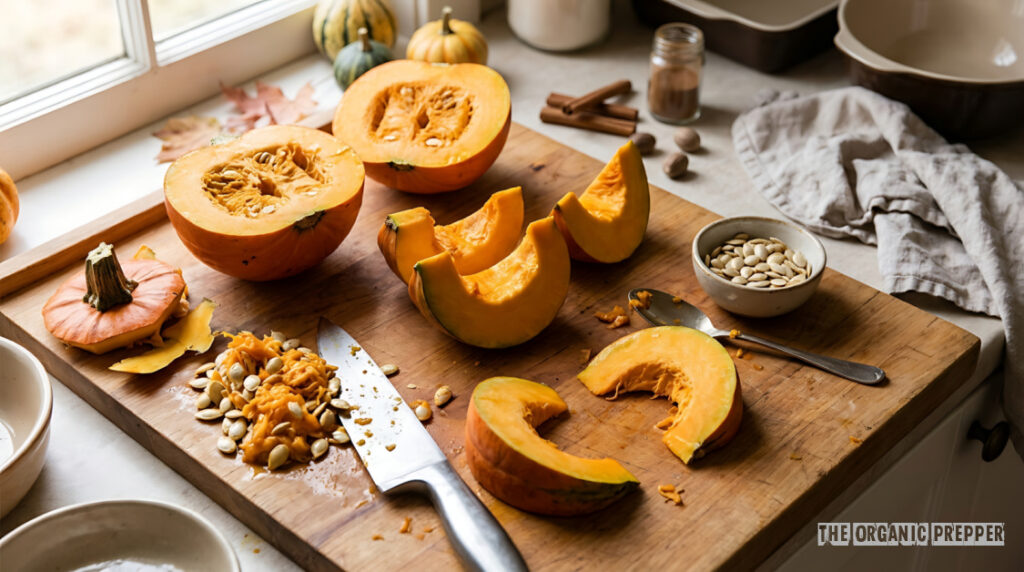
The easiest way to remove the rind from a pumpkin is to cut it in half, remove the seeds (reserving them, of course), and bake the halves on a cookie sheet until the flesh is tender (30-45 minutes, depending on the size of the halves). Then you can just scoop out the cooked pumpkin without risking your digits hacking away at that rock-hard rind. This is the perfect way to do it if you are making a puree or pie filling.
But if you are feeling bold, energetic, and handy with a knife, and you need your pumpkin in cubes, you can cut it up like they do in this super short video.
How to cook with pumpkin fresh from the farm
Forget the idea that pumpkin is only for sweet dishes and Pumpkin Spice Lattes. You can substitute pumpkin in any recipe in which you would normally use winter squash. The following recipes have no exotic ingredients and are delicious and thrifty.
6 Delicious Ways to Make Roasted Pumpkin Seeds
When I was a kid, my mom made fried pumpkin. It’s super easy – you cook the pumpkin until it’s soft and mashable. Then she heated up cooking oil (you can also use bacon grease) and pan-fried the mashed pumpkin until there were crispy bits. Season this with salt, pepper, garlic powder, and onion powder to taste. It pairs nicely with home-cooked pinto beans and biscuits or cornbread for a frugal and filling meal.
Don’t forget your pumpkin seeds
This is the basic recipe for pumpkin seeds. Below the recipe, see some flavor variations you might enjoy.
Ingredients
- Seeds from 2 pumpkins
- 2 tablespoons of olive oil
- 1 teaspoon of salt
Directions
- Carefully wash the pumpkin seeds in a strainer. Don’t worry if there is a little bit of pumpkin flesh still on them, but you’ll want to remove the big chunks. The seeds will feel very slimy in your hands when they’re washed – this is entirely normal.
- In a large mixing bowl whisk together the seasonings and olive oil.
- Toss the washed pumpkin seeds in the oil mixture.
- Spread the seeds out in a thin single layer on a baking sheet.
- Bake at 275 degrees for 1-2 hours, or until seeds are nice and dry. Stir every half hour.
Store the pumpkin seeds in a jar with an airtight lid for up to a week.
Variations
Here are some other flavor combos for your pumpkin seeds. If you are adding something likely to burn, like sugar or some kind of cheese, add that stuff toward the end of your roasting time so it doesn’t burn. Sturdy herbs will be just fine from the start.
Garlic Parmesan:
- 1-1/2 tablespoons Parmesan cheese
- 1 tablespoon garlic powder
Ranch:
- 1/2 teaspoon onion powder
- 1/2 teaspoon parsley
- 1/4 teaspoon dill
- 1/4 teaspoon garlic powder
- 1/8 teaspoon celery seed
- 1/8 teaspoon paprika
- 1/8 teaspoon black pepper
Salt and Pepper
- 1/2 teaspoon black pepper
Cinnamon Sugar
- 1 tablespoon brown sugar
- 1/2 teaspoon cinnamon
- reduce salt to 1/4 teaspoon
Barbeque
- 1-1/4 teaspoon onion powder
- 1 teaspoon garlic powder
- 1/2 teaspoon smoked paprika
- 1/4 teaspoon cayenne pepper
- 1/4 teaspoon ground mustard
- 1/4 teaspoon light brown sugar
Salted Caramel Pumpkin Seed Brittle
Omit regular salt in the recipe above.
- 1/2 cup of caramel sauce
- 1 teaspoon of flaked sea salt
Directions
- Spread your seeds on the cookie sheet and roast as above.
- Once the seeds are cooked as much as you prefer, drizzle the caramel sauce over the seeds and sprinkle the sea salt on that.
- Bake for about 5-10 more minutes.
- Allow this to cool completely and then break it into bite-sized pieces.
Pumpkin seeds have healthy fat and a lot of fiber. They’re very good for you, but not if you eat too much. That is another recipe – a recipe for digestive disaster. Limit the amount you eat at one time and monitor your children’s intake too.
Preserving
If you can’t eat the whole pumpkin now, you can preserve some for pumpkin-y goodness later!
Freezing
The most foolproof way to freeze pumpkin is to make pumpkin puree. Then, once it cools, fill freezer bags. Lay them flat on a cookie sheet to freeze so that you have nice, easily stackable rectangular packages of puree. Freeze them in 1 or 2 cup quantities for recipe-sized portions. If you want chunks, cut the pumpkin into cubes and then blanch it for 3 minutes, dunking it immediately in an ice bath. Then, freeze the pumpkin chunks on a cookie sheet and move them to storage bags once they’re frozen.
Dehydrating
You can also dehydrate your pumpkin, either in puree form or sliced form. I prefer the puree version because the end result is more useful. After you dehydrate the puree, you’ll powder it for inclusion in future deliciousness like smoothies or soups. It’s an easy way to add a lot of nutrition to your pantry in a very small space.
You’ll need to cook the pumpkin before dehydrating it. Spread your puree on fruit-leather sheets or tray liners and dehydrate at 125 for anywhere from 10-14 hours. It should be brittle and easy to snap when it’s done.
Then, in batches, use your food processor to turn this into a powder. Done!
Canning
You’ve probably heard that you shouldn’t can pumpkin. But wait – I have good news!
It is actually just pumpkin purees that should not be canned because the purees are so thick that they don’t heat evenly, leaving them open to the risk of botulism. (The same is true for other purees too, like mashed potatoes or squash.) But, it’s perfectly fine to can your pumpkin in cubes in a pressure canner, and then puree the pumpkin when you need it.
I leave the pumpkin that I can unseasoned so that it can be used flexibly, in either sweet or savory dishes. If you have other winter squash you need to preserve, you can use these instructions for that, too.
Pumpkin is a low-acid food and MUST be pressure canned. No ifs, ands, or buts.
Ingredients:
- Uncooked pumpkin
- Boiling water as needed
Directions:
- Cut up your pumpkin or squash and remove the rind, seeds, and strings.
- Cut it into 1-inch chunks.
- You can raw pack your pumpkin or squash. Fill your quart jars with cubes, leaving 1 inch of headspace.
- Fill the jar with hot water, keeping your inch of headspace.
- Slide a rubber spatula around the sides of the jar to remove air pockets.
- Process the pumpkin in your pressure canner for 90 minutes at 11 pounds of pressure, adjusting for altitude.
When it’s time to use your canned pumpkin, it will be soft enough to mash with a potato masher.
If you’re making something thick, like pie filling, drain the liquid from the jar before mashing it. Save that tasty pumpkin liquid for something you’re cooking in the next day or so. For soup, you can leave the liquid in and season to taste.
What about you?
Are you a pumpkin fan? Do you buy the cans from the grocery store or use farm-fresh pumpkin? How do you cook and preserve pumpkin? Tell us about your favorite ways to eat pumpkin in the comments.